Setting - adjusting an internal rotor ignition with the Easyboost dial indicator
In this tutorial, we'll look at how to set and adjust an internal rotor ignition with the Easyboost dial indicator, on an AM6 engine. This tutorial is available in video format (see bottom of page).
- Ratchet with sockets
- Allen key
- Spark plug spanner
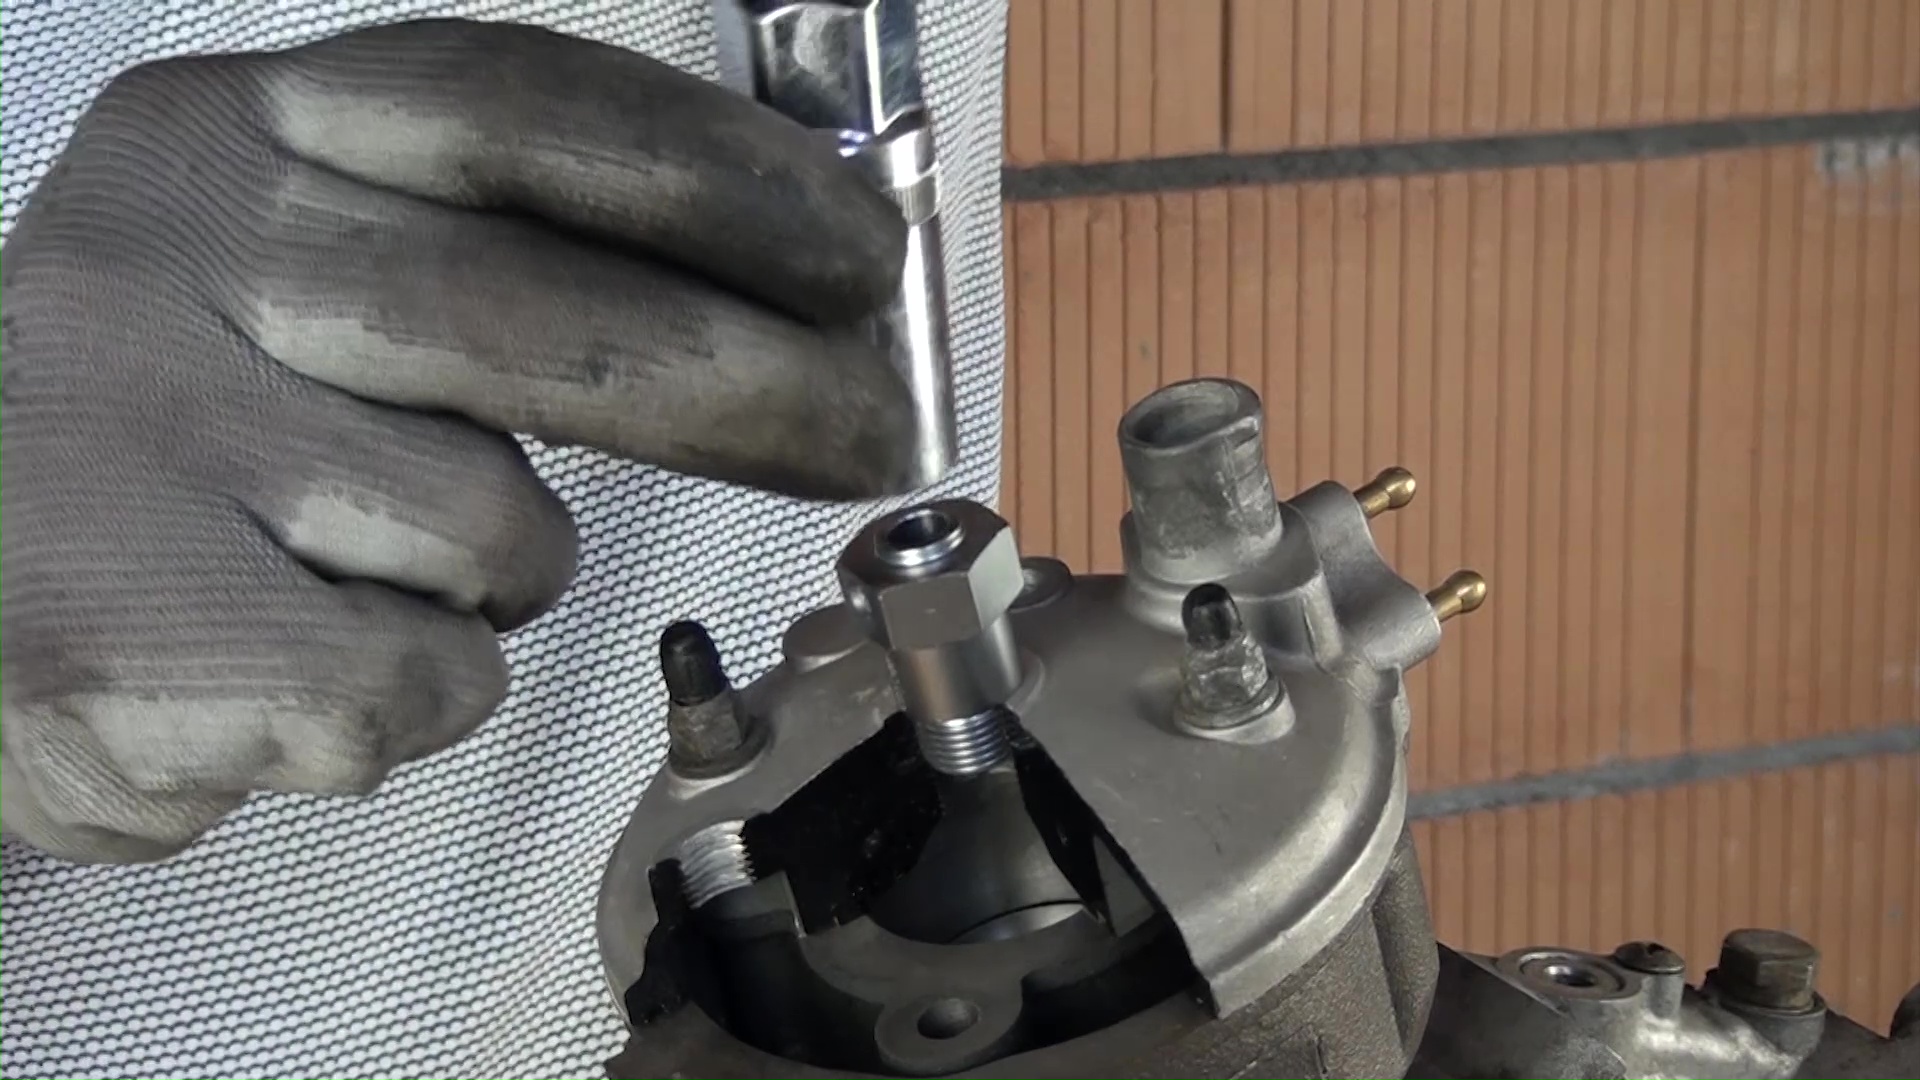
Installing the Easyboost dial indicator adaptor
Start by removing the spark plug and installing the Easyboost comparator adaptor in its place.
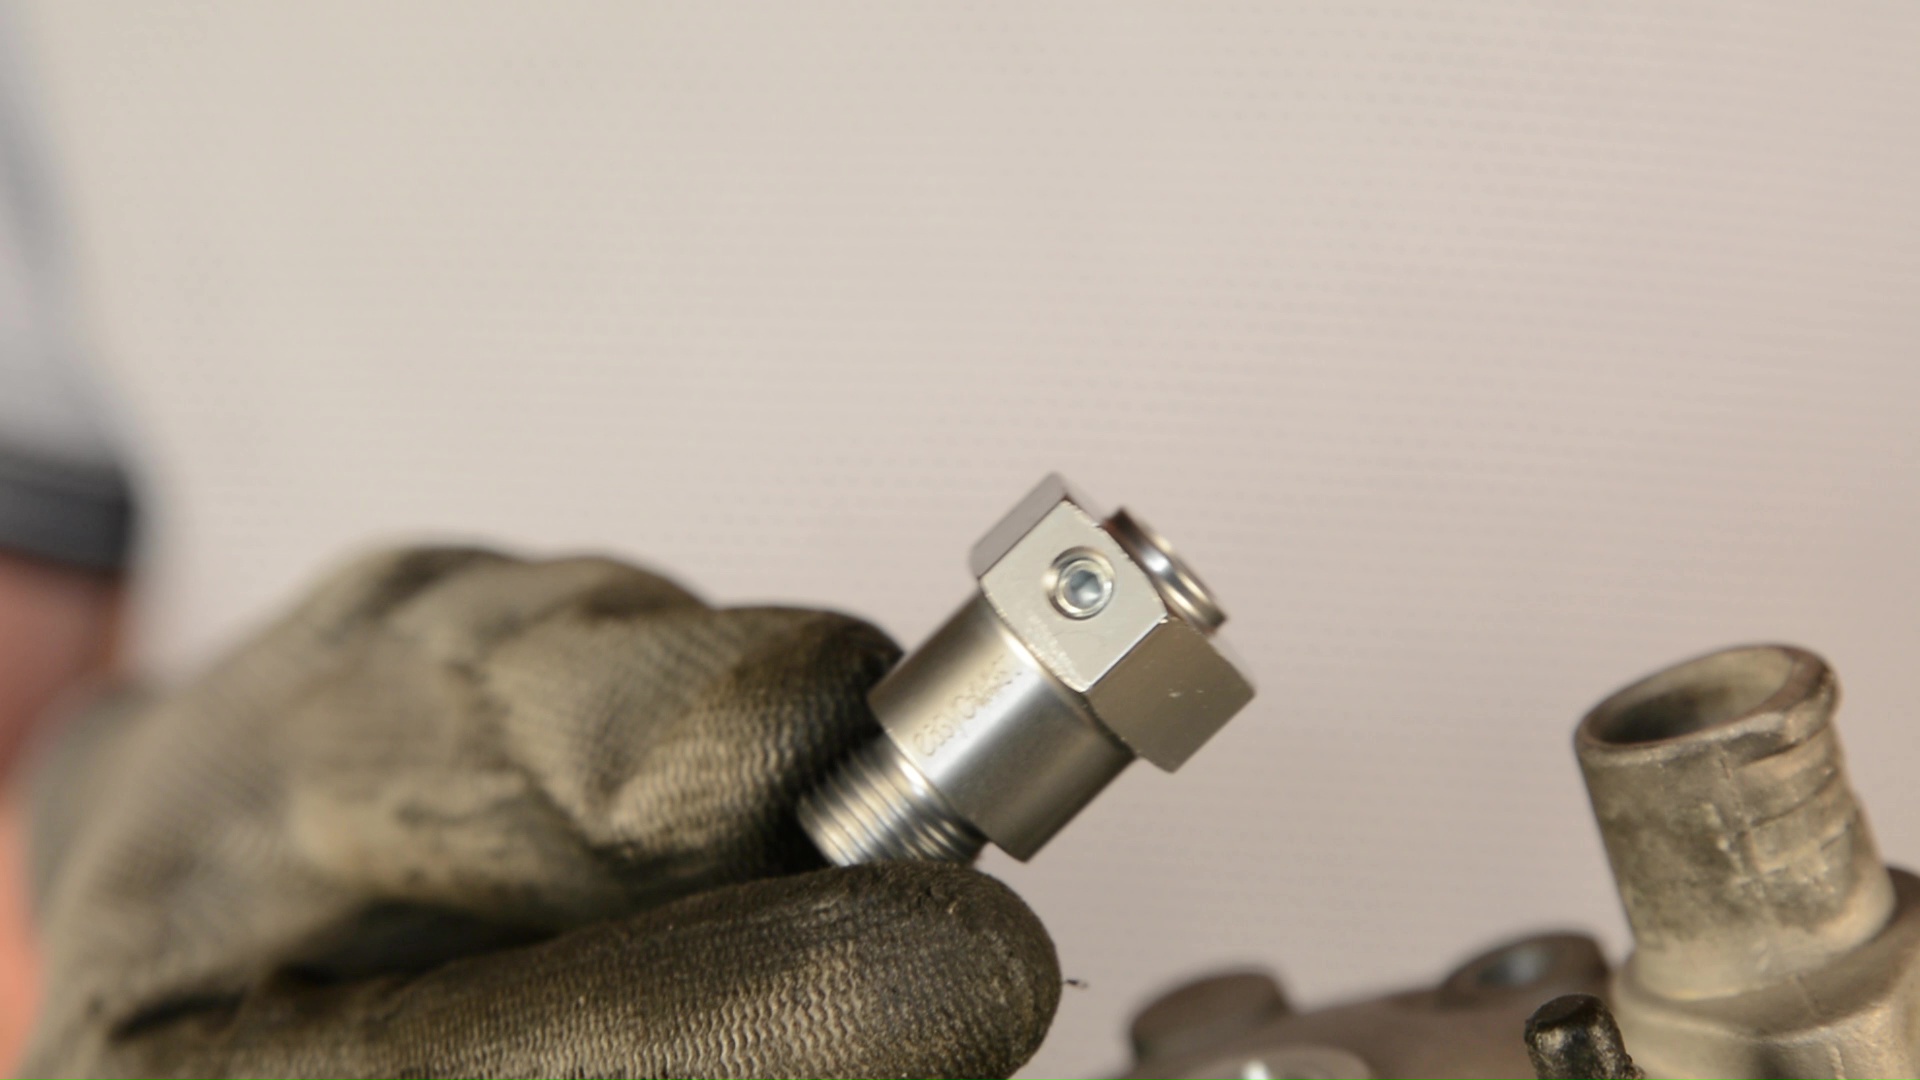
Tightening the Easyboost dial gauge adaptor
Tighten the adapter firmly using a spark plug spanner or a ratchet fitted with a 21 socket.
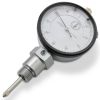
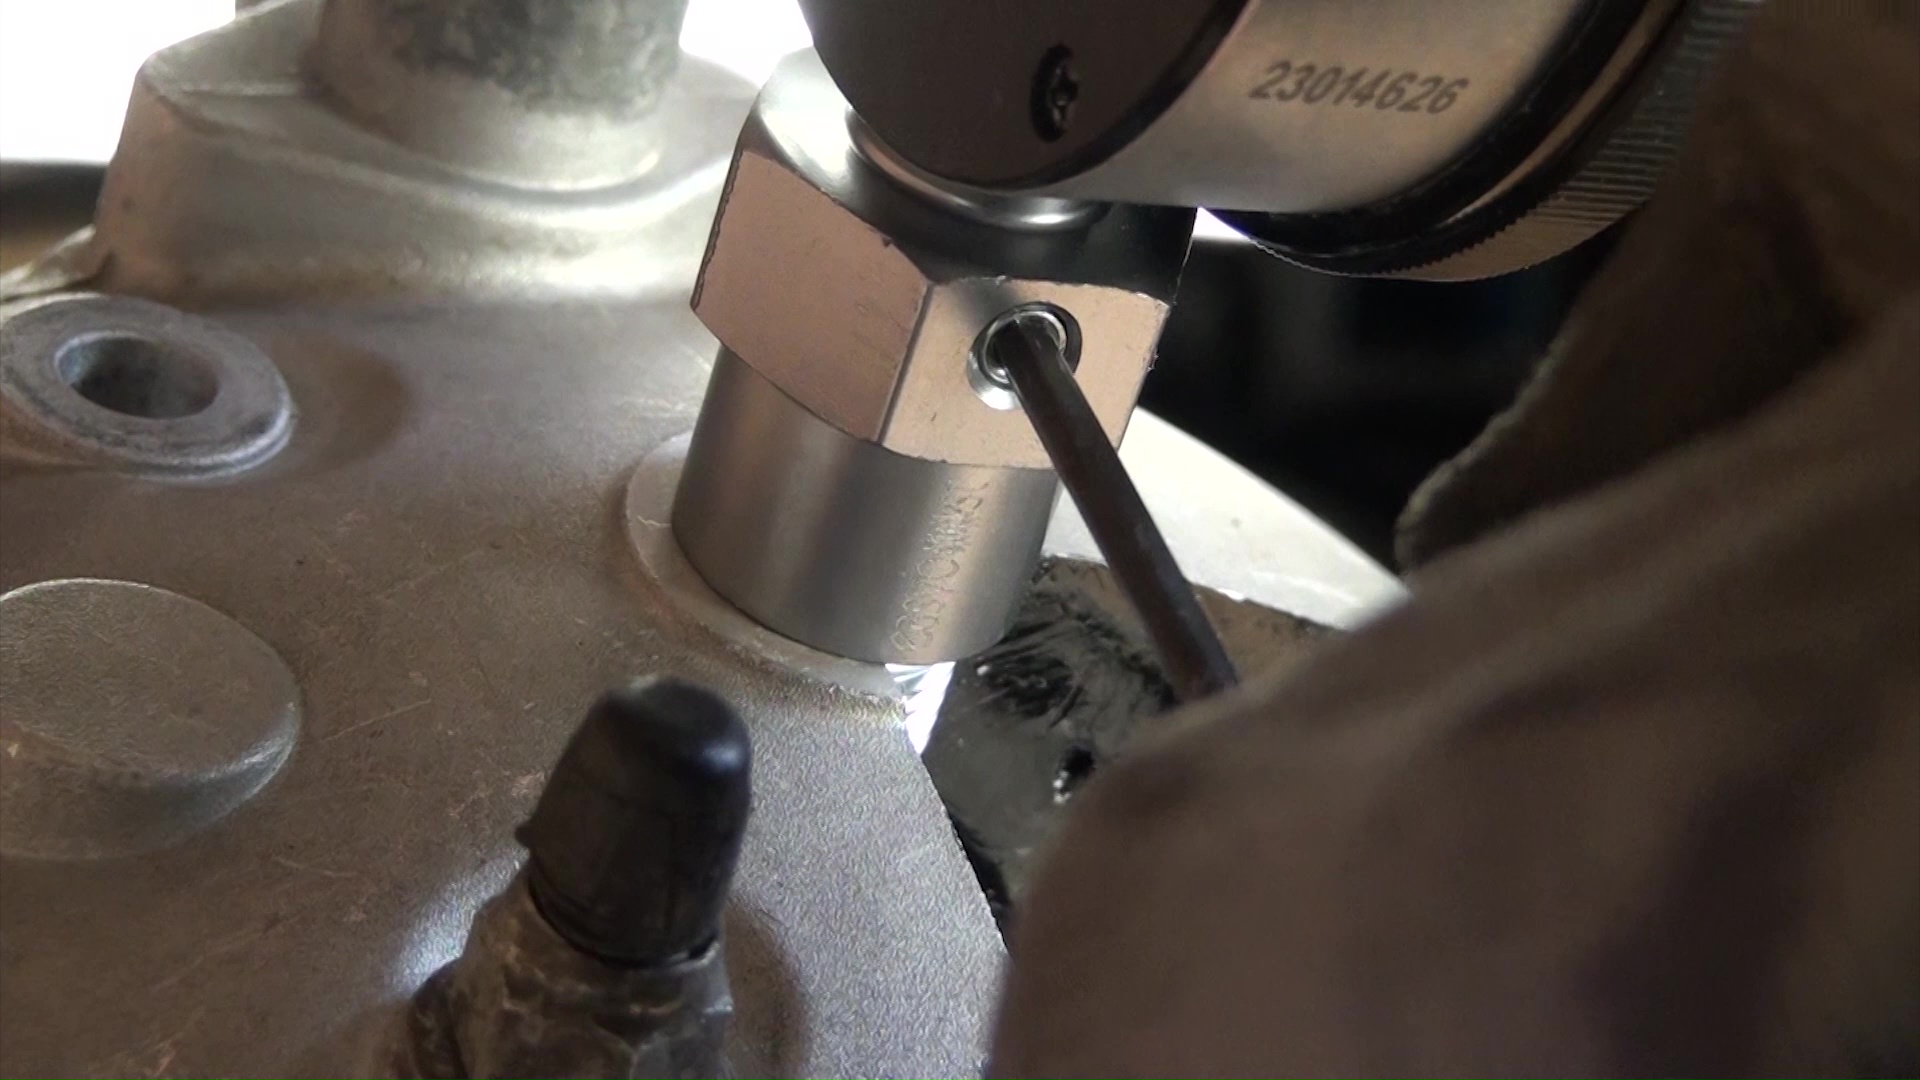
Installing the dial gauge
Gently slide the dial indicator into the adapter.
Tightening the dial gauge set screw
Tighten the set screw to hold the dial indicator securely in place.
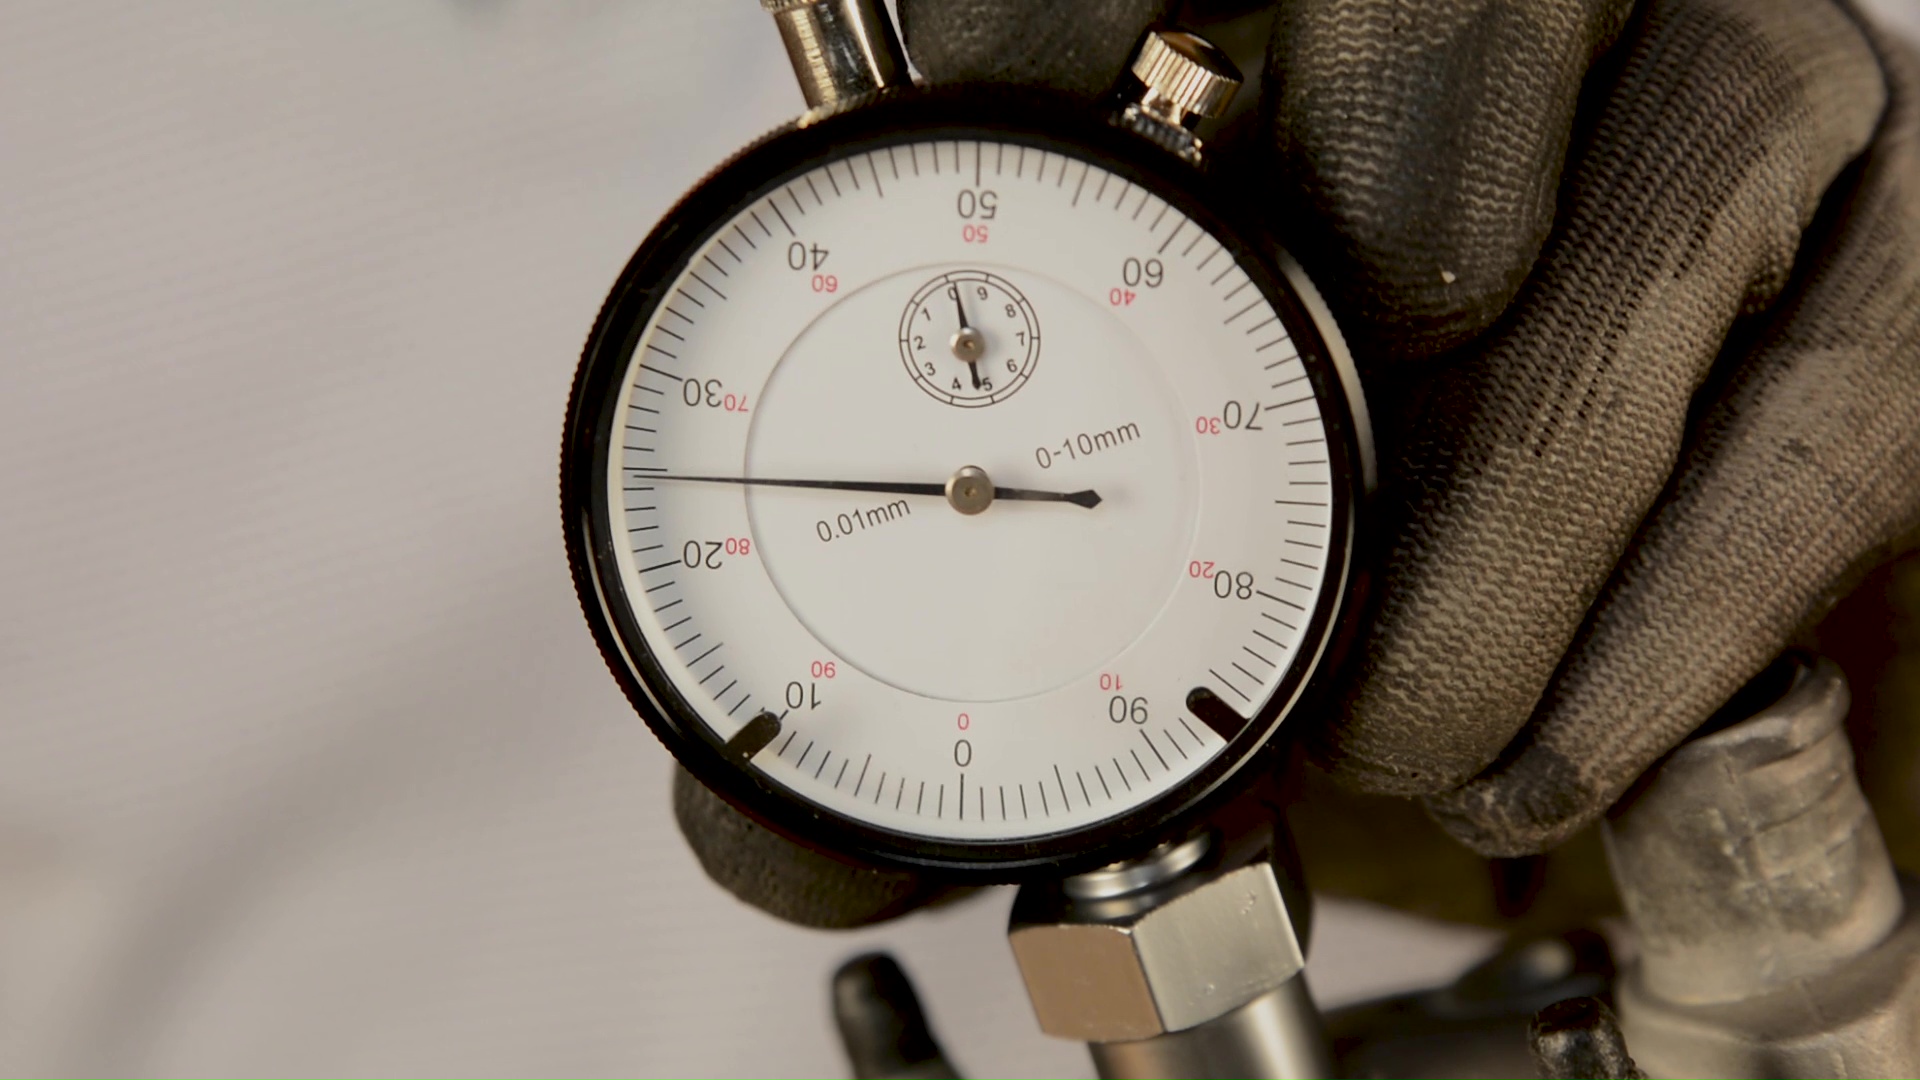
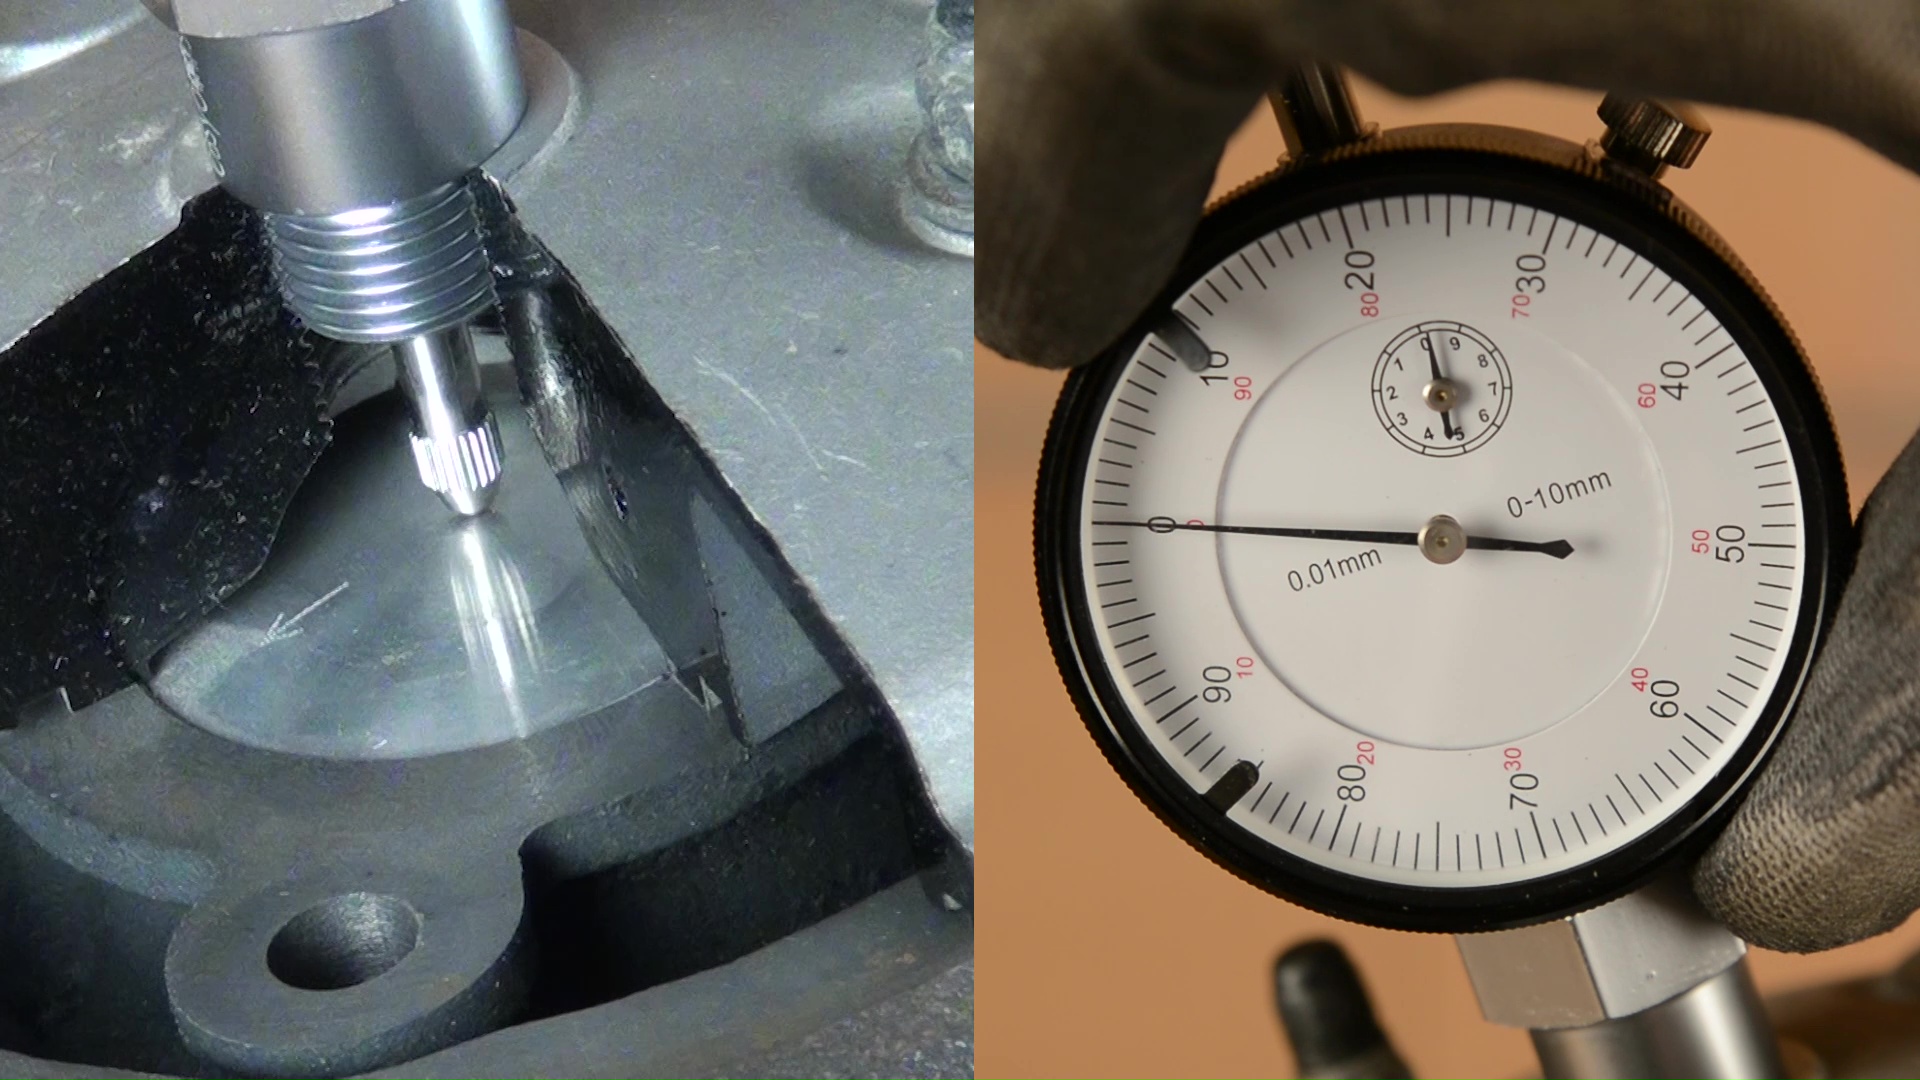
Finding top dead centre (TDC)
Rotate the crankshaft until the needle on the dial indicator changes direction. This indicates that you have reached TDC.
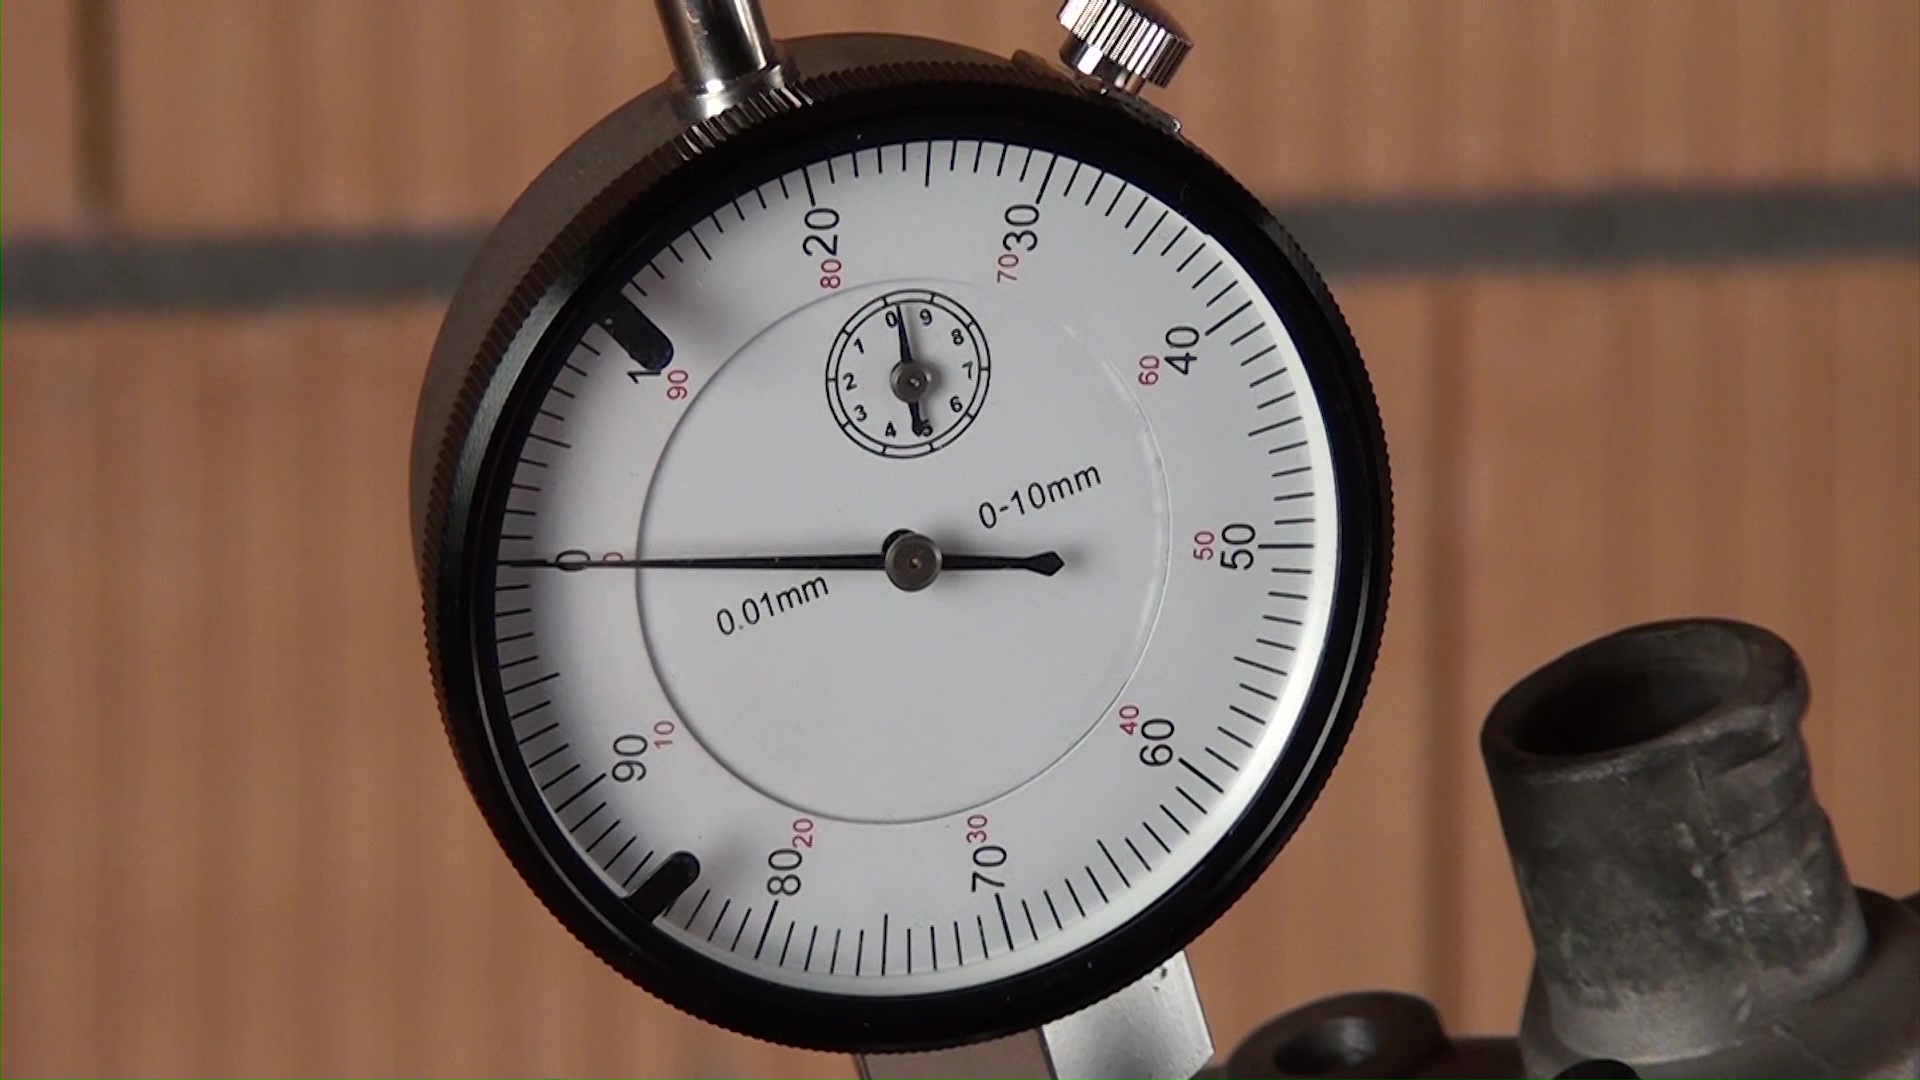
Adjusting the dial
Turn the dial gauge until the "0" is aligned with the needle.
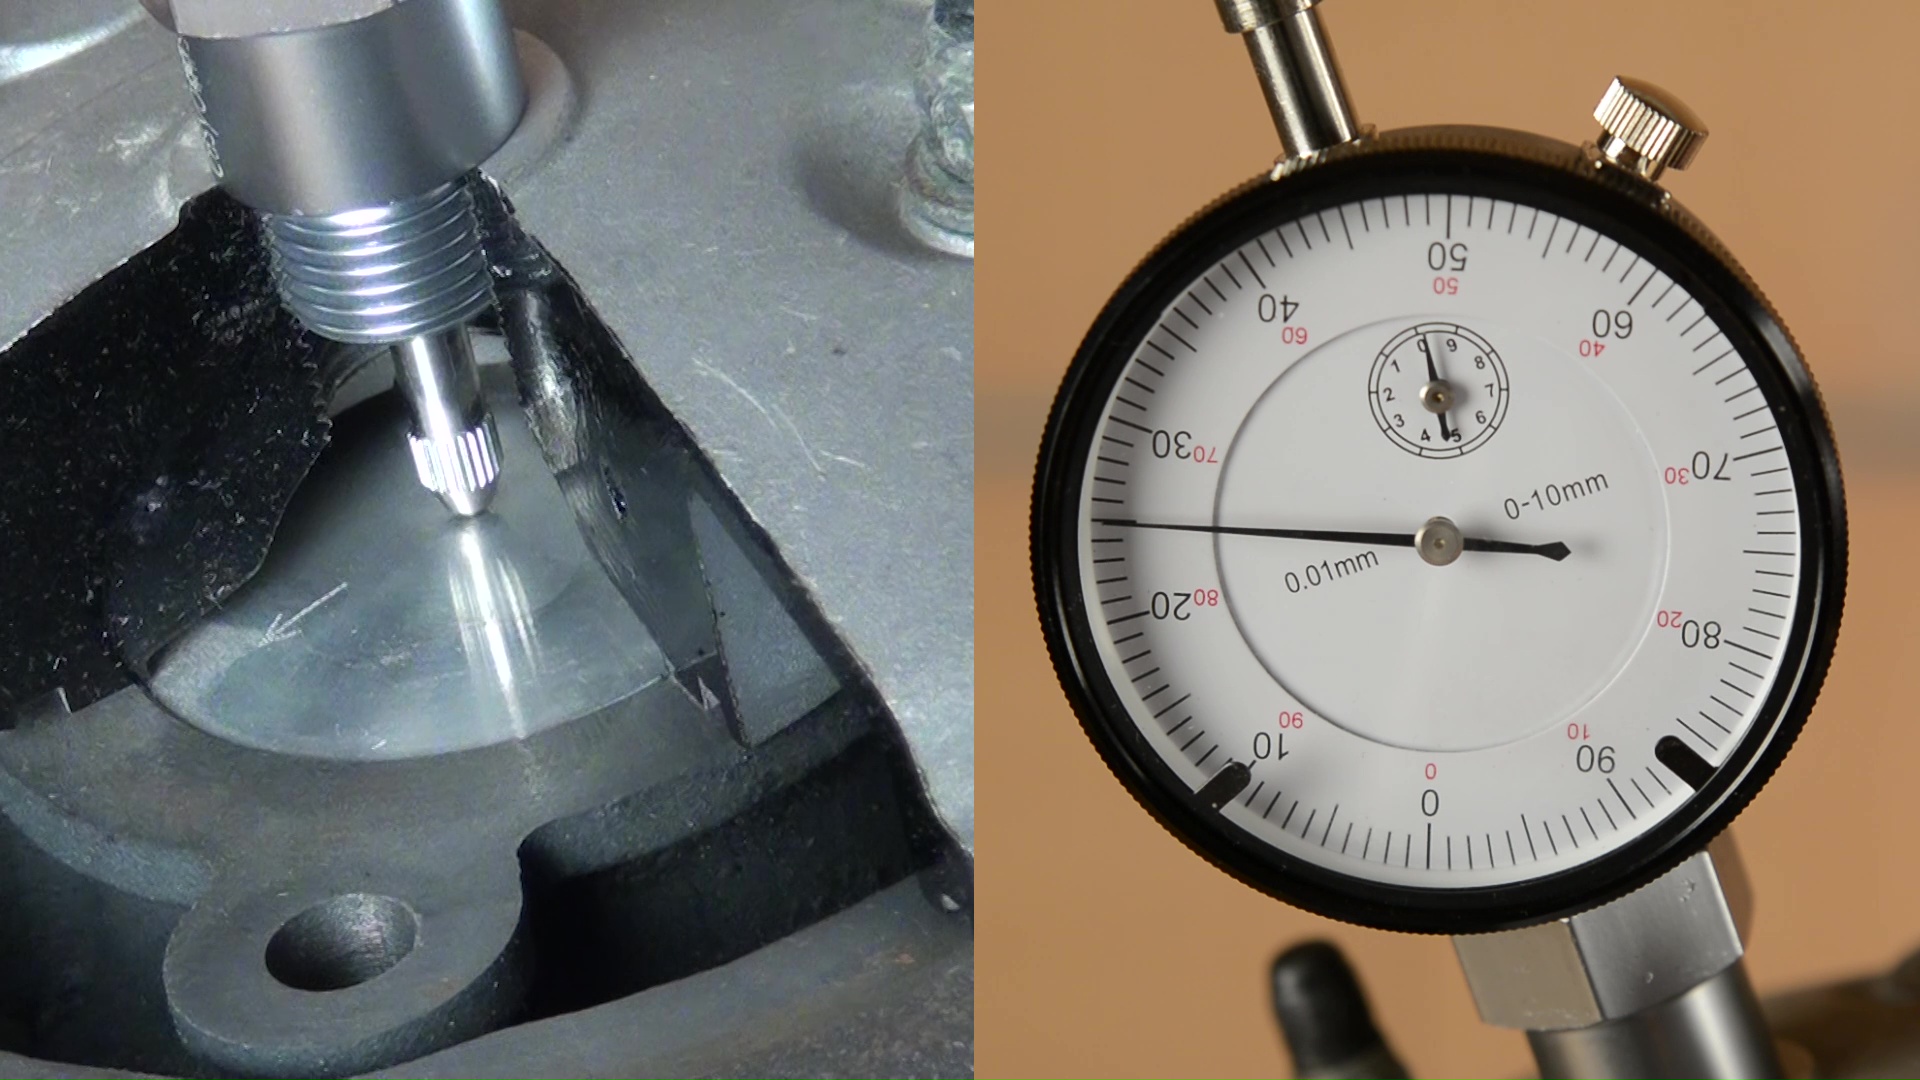
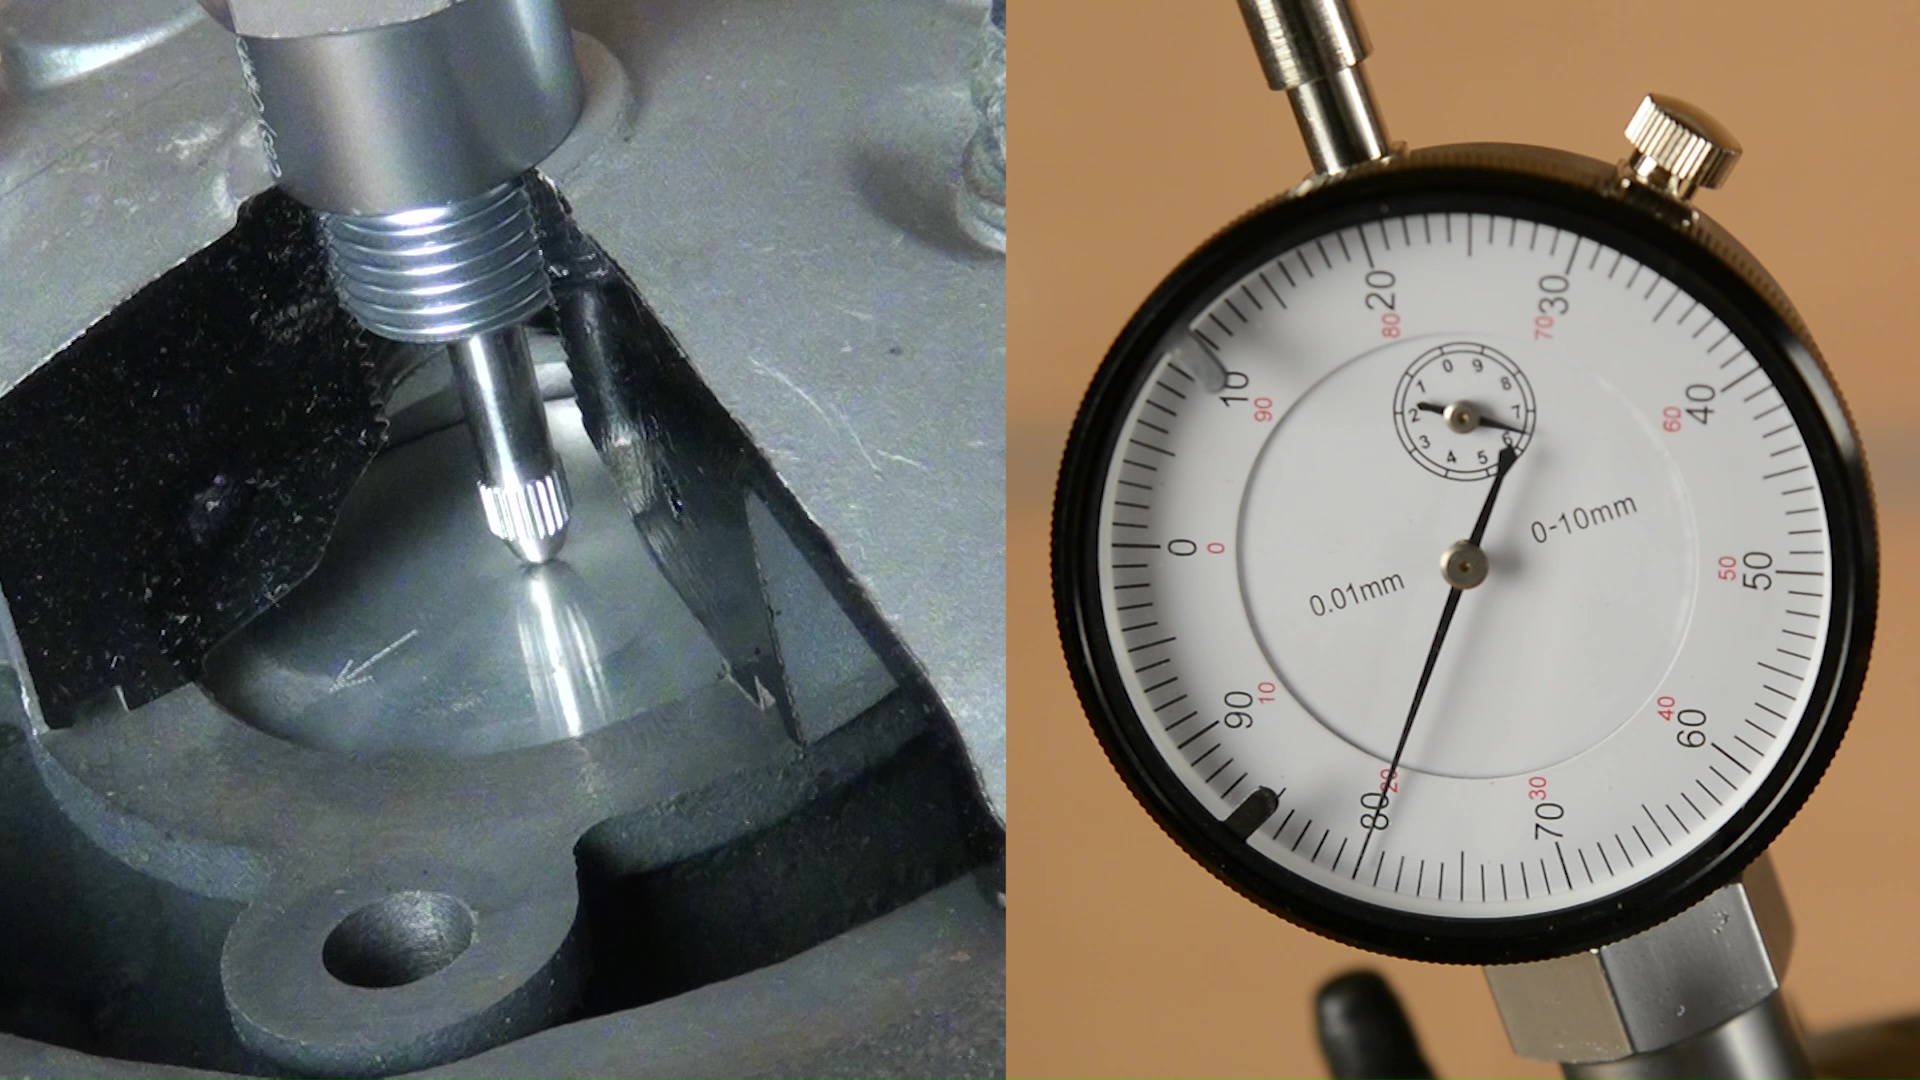
Adjusting the timing value
The ignition manufacturer recommends a timing of 3.20 mm before TDC. To do this, turn the crankshaft in the opposite direction of rotation to obtain ignition timing advance. For example, for the AM6 engine, turn the crankshaft clockwise from the ignition side. Each revolution corresponds to 1 mm of advance, and each graduation is equivalent to 0.01 mm of advance. You will therefore need to make 3 turns and 20 graduations with the needle.
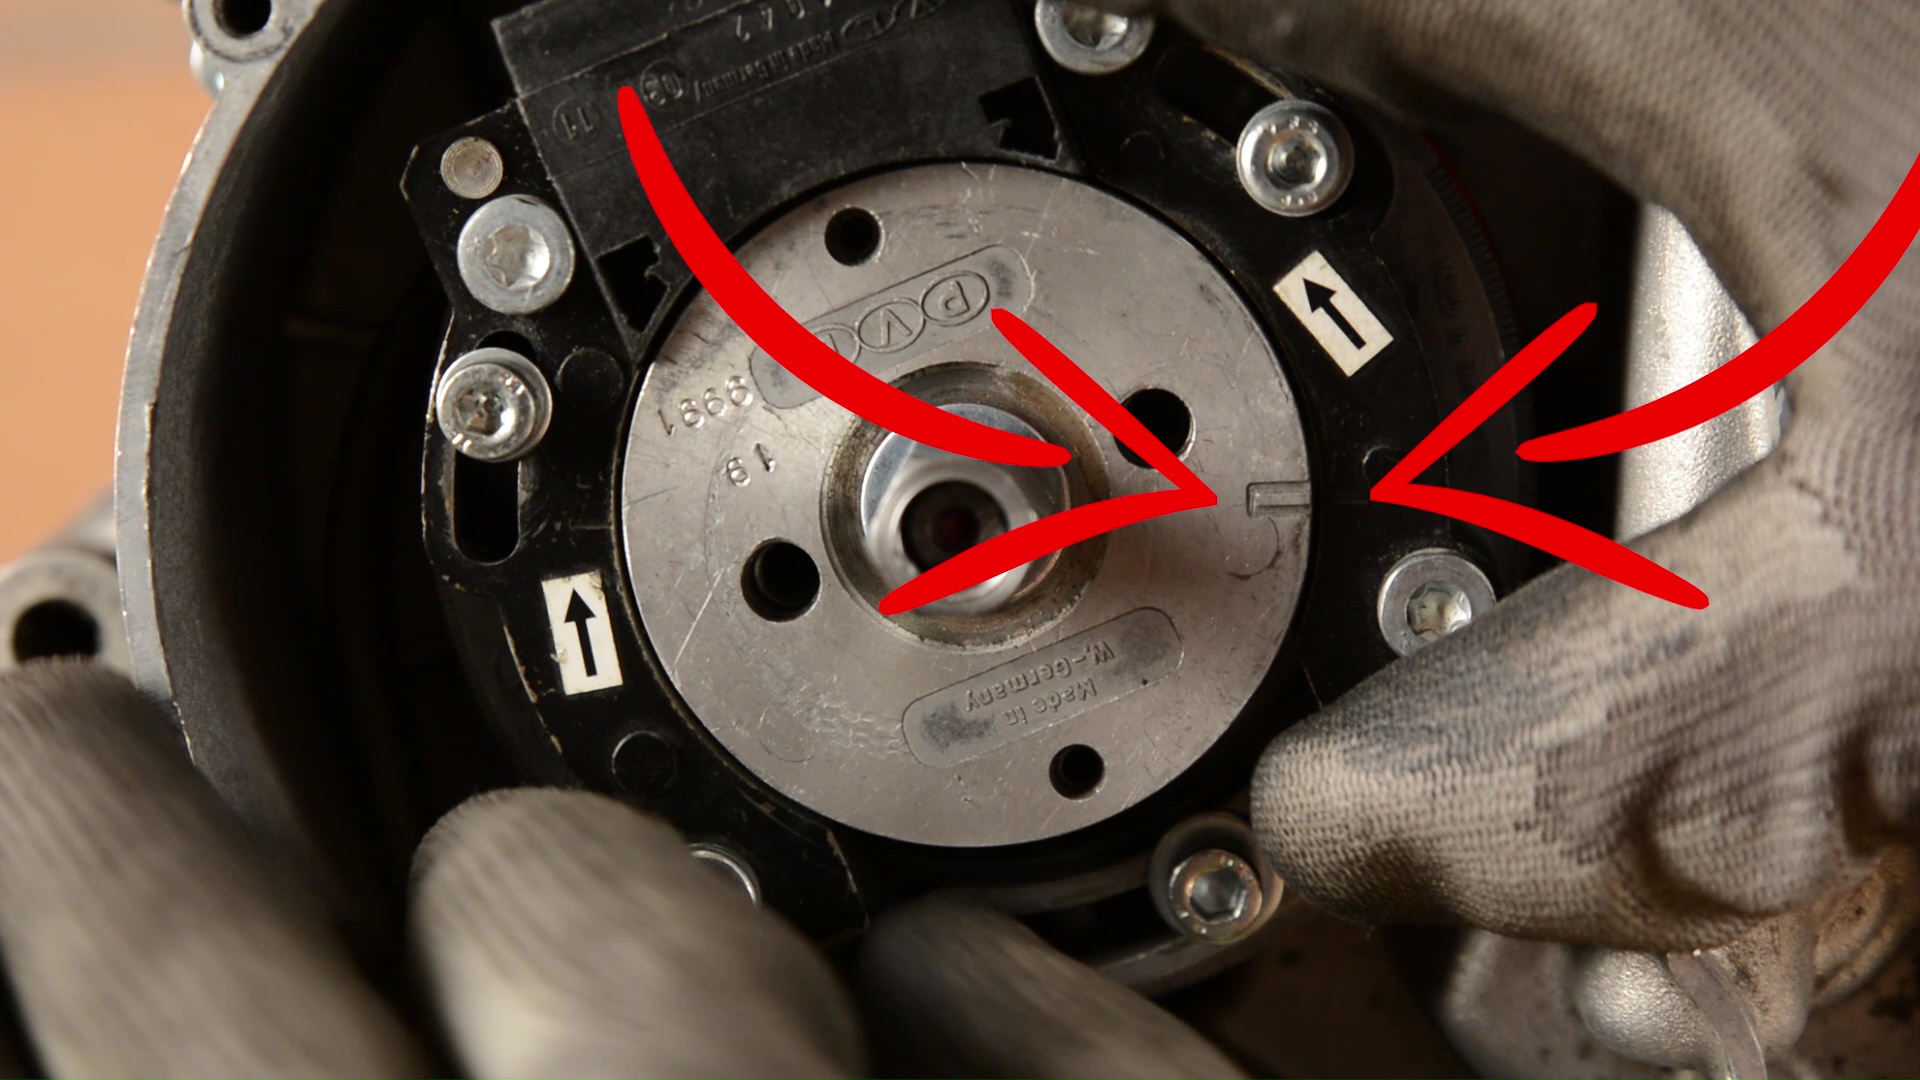
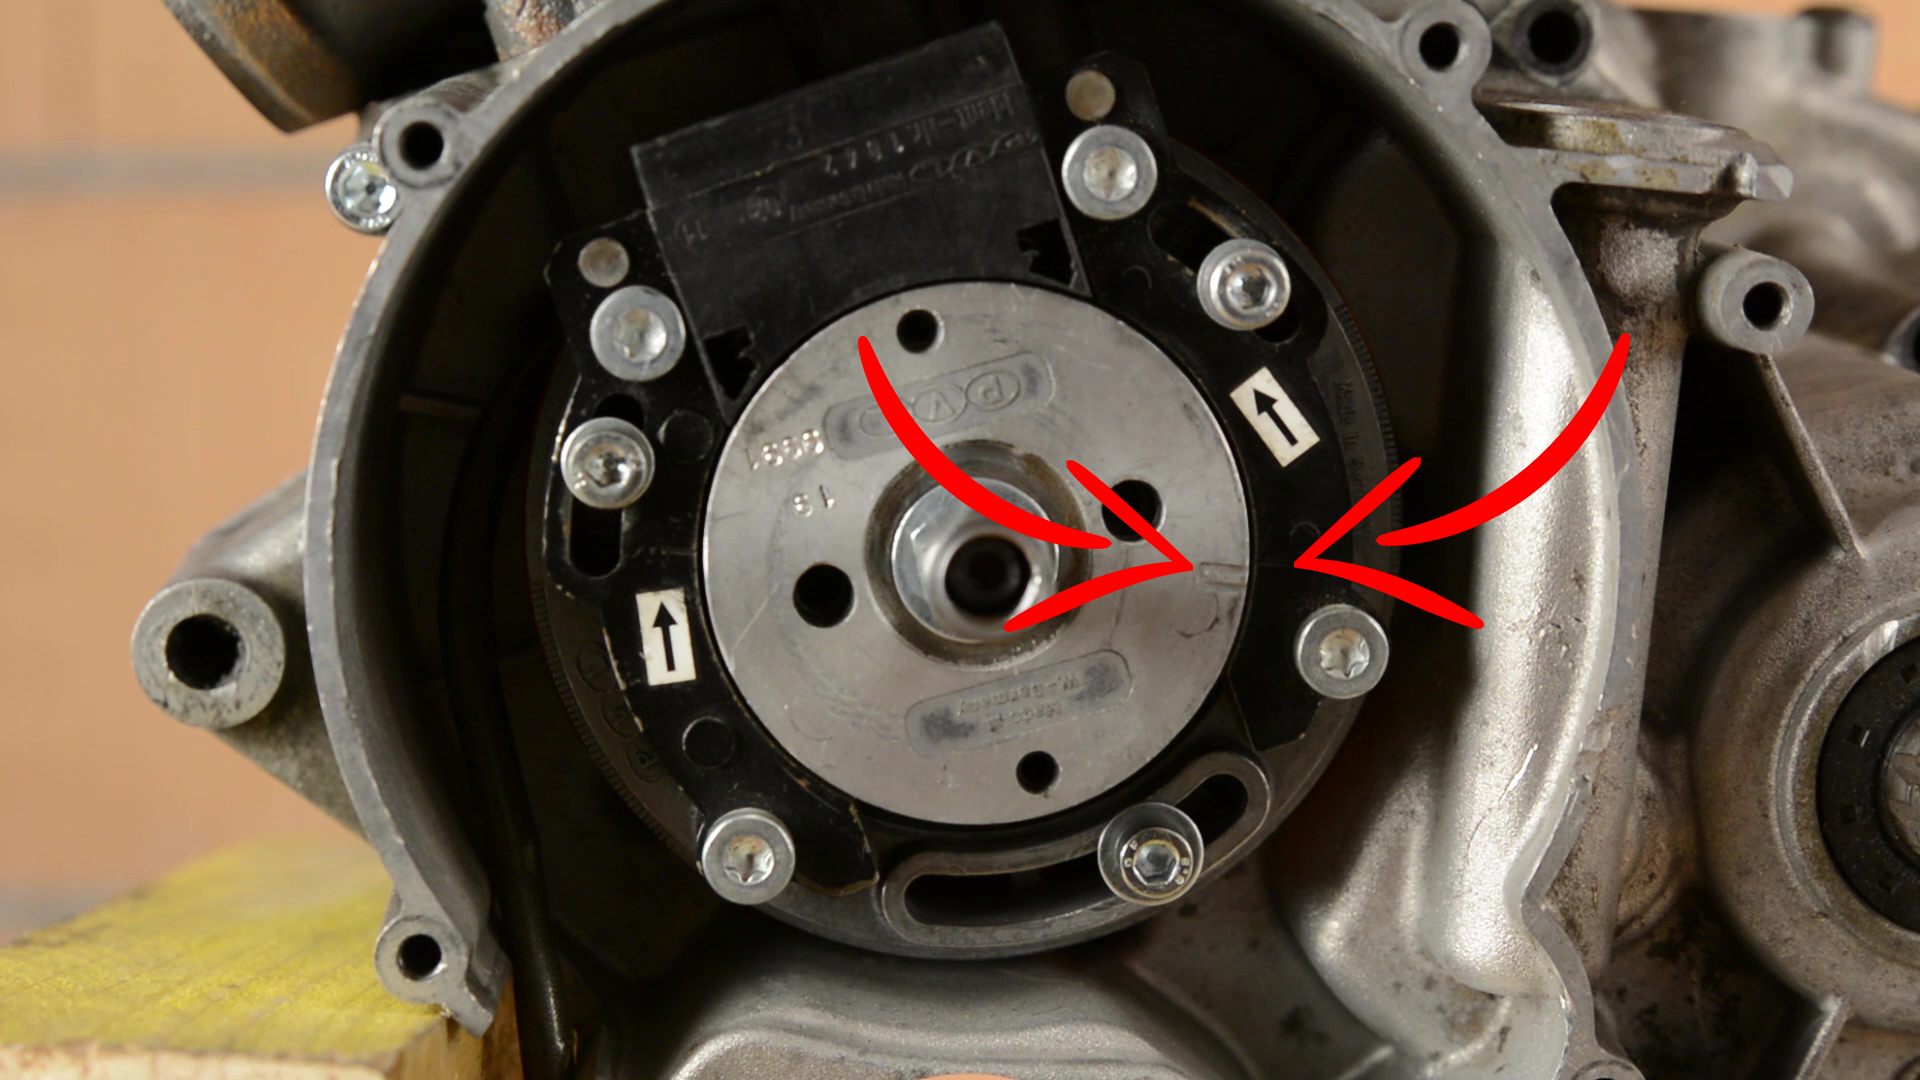
Aligning the marks
Once you have positioned the piston 3.20 mm before top dead centre, place the ignition rotor, aligning its mark with that on the stator.
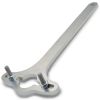
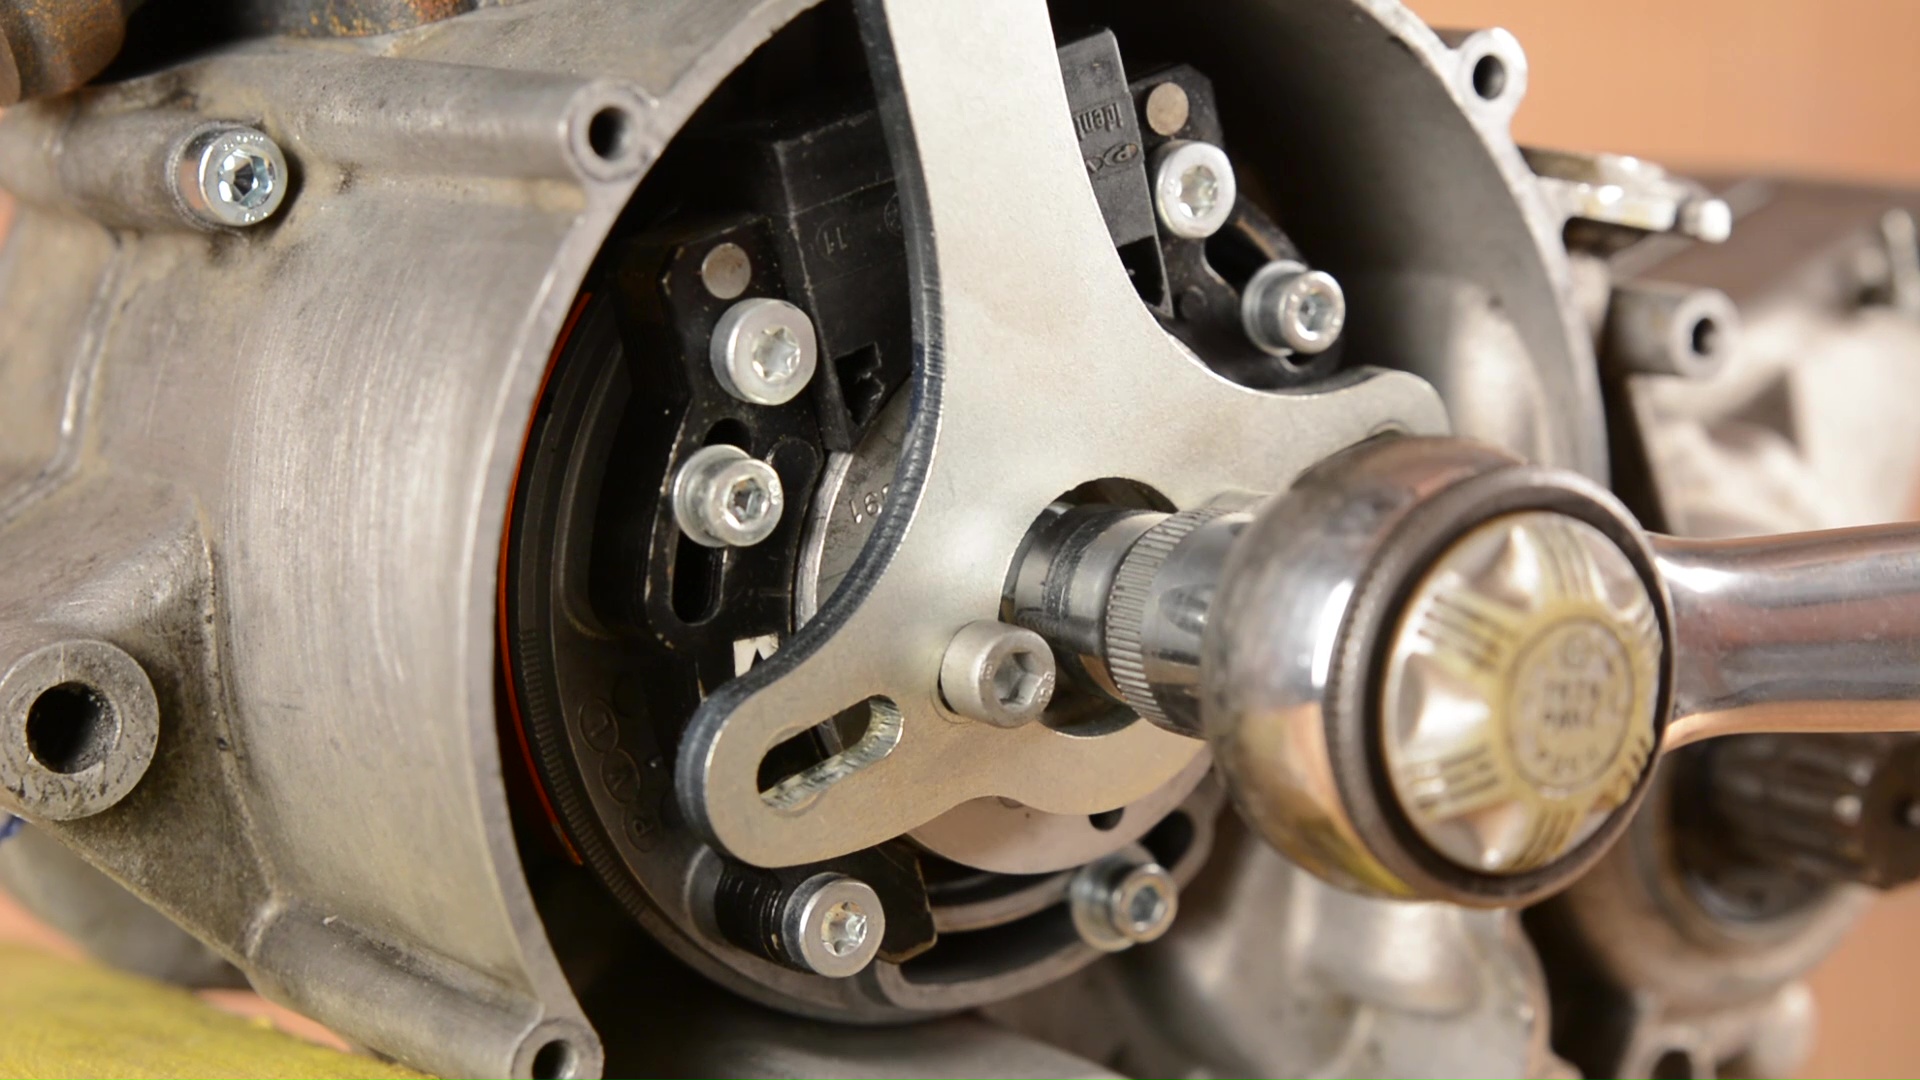
Tightening the nut
To tighten the crankshaft nut firmly, use the Easyboost rotor lock spanner.
Checking the timing
After tightening the crankshaft nut, check the timing by repeating the same steps above.
Fine tuning
If the two marks are not perfectly aligned, loosen the three screws on the stator to rotate it and fine-tune the setting.
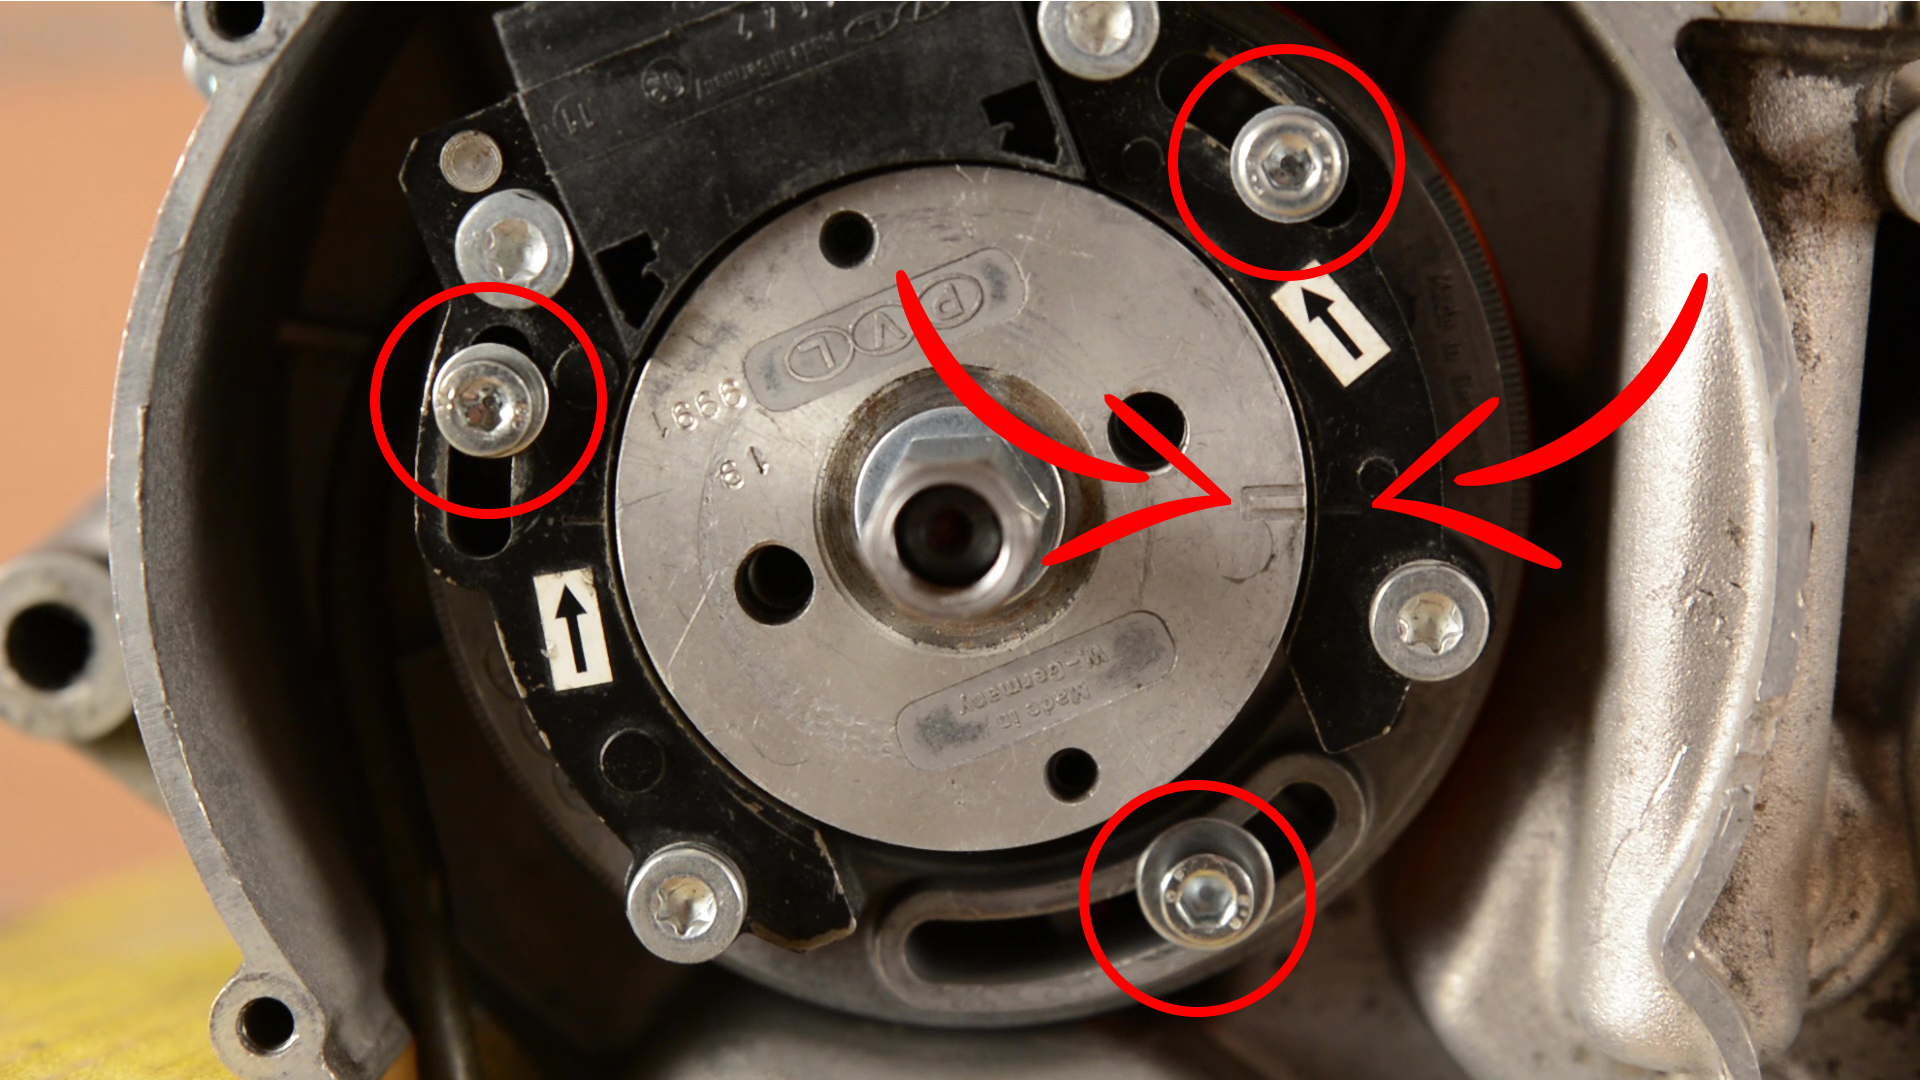
Setting complete
Adjustment is complete when the two marks (on the stator and rotor) coincide perfectly.