How to dismantle or change a variator, clutch, belt, rollers on TMAX?
- Ratchet or torque spanner with sockets
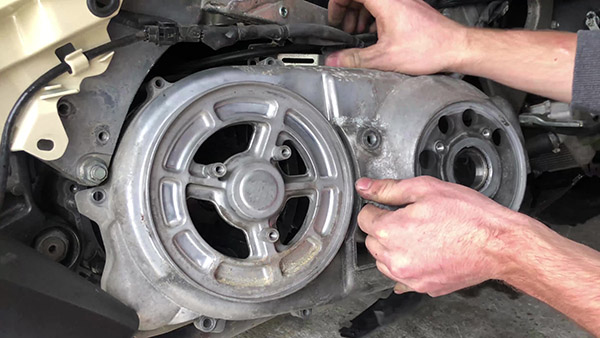
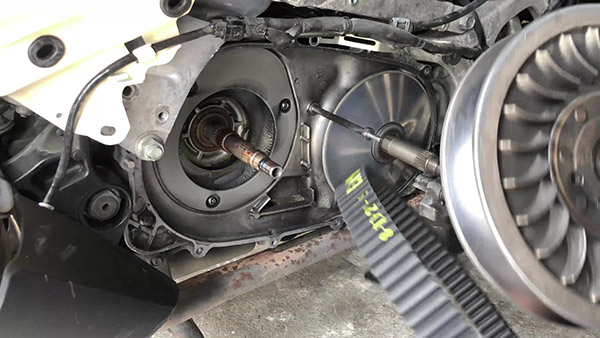
Removing the TMAX fairings
Unscrew all the fixing screws of the air intake, footboard and rocker panel to allow free access to the CVT housing.

Dismantle the air filter and the TMAX variator housing.
Once the fairings have been removed, access to the CVT housing is possible. The air filter must therefore be removed first and then the housing fixing screws must be completely unscrewed.
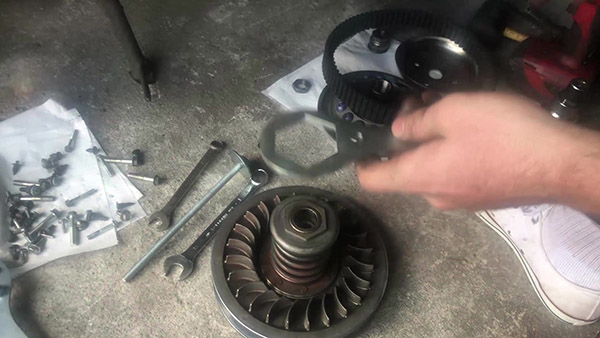
How do I dismantle and change the TMAX 500-530-560 drive?
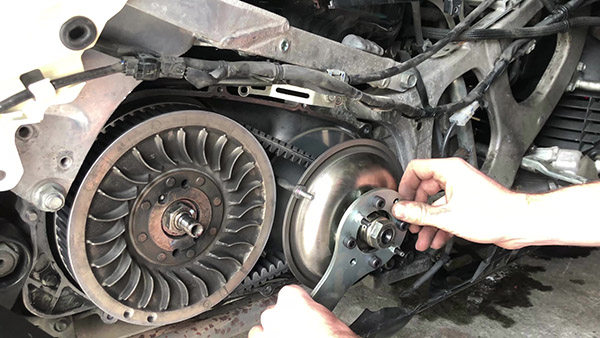
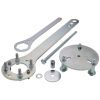
In order to remove the variator easily, the Easyboost variator holding tool, equipped with the 4 M8 screws and 4 M8 nuts, is required. This will enable the variator to be locked in place so that the nut can be loosened using a socket spanner or ratchet.
Loosen the drive nut
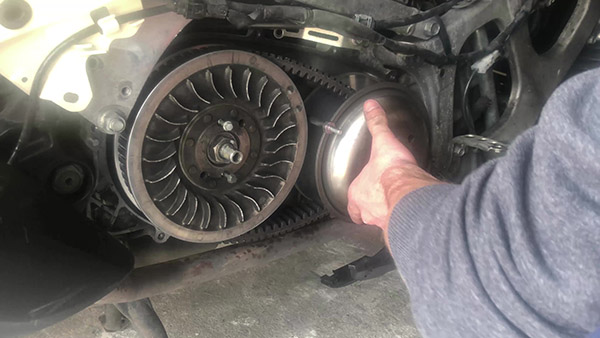
The variator nut can be loosened using a ratchet with a socket of 29 and the Easyboost spanner.
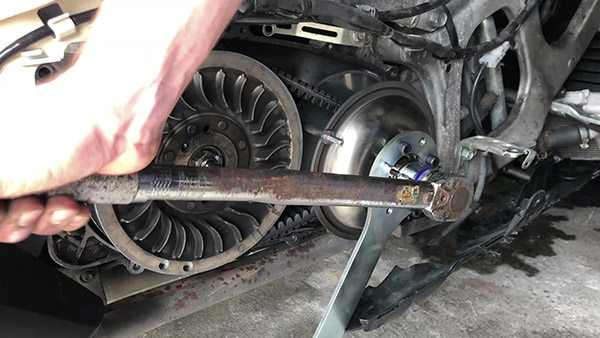
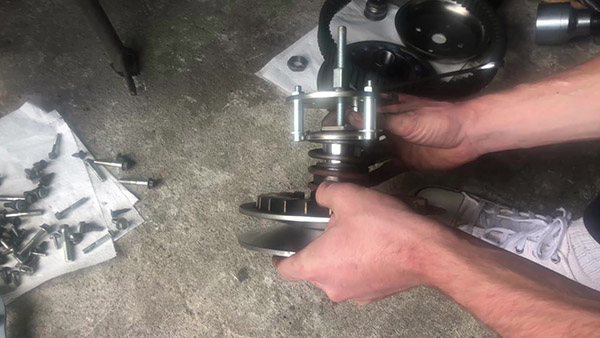
Dismantle the torque drive
To remove the torque drive, place the 2 M6 screws and 2 nuts on the Easyboost multi-purpose spanner. This configuration enables the torque drive to be locked. Loosen the nut of the torque drive using a spanner fitted with a 27 " long " socket.
How do I remove and change the belt of the TMAX 500-530-560?
Tighten the 2 M6 screws at the locations provided on the torque drive so as to move the mobile flange away from the fixed flange. When the torque drive is completely off its axis, the belt will easily come out. Care must also be taken not to pinch your fingers when the belt comes out of its housing.
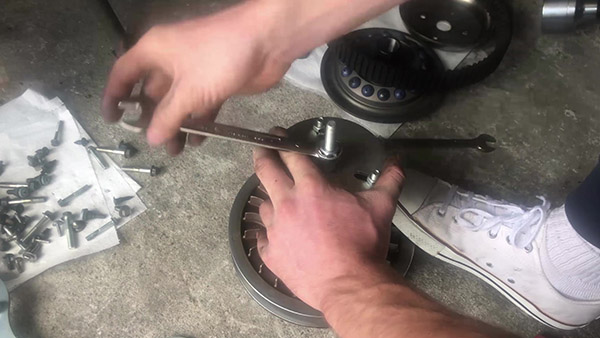
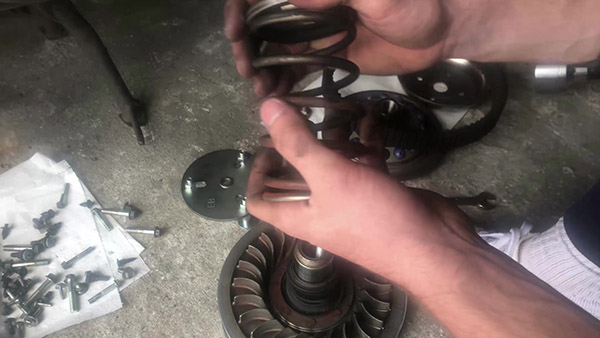
Dismantle the thrust spring
Place the Easyboost thrust spring removal tool on the torque drive/couple/spring assembly and tighten the nut. As the spring cup is already in the stop position, no attempt should be made to compress the spring.
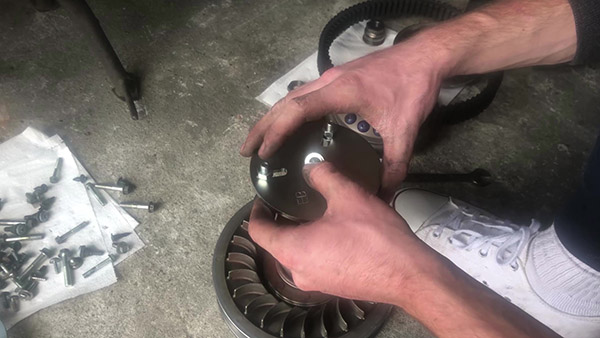
Unscrew the nut of the torque drive
The locking tool holds the thrust spring and now exerts a slight pressure on the cup. The nut of the torque drive can therefore be unscrewed by hand.
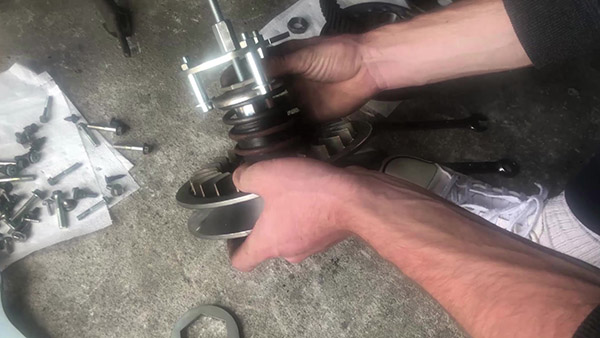
Loosen the thrust spring
All that remains to be done is to loosen the axle nut so that the spring can be released gradually.
Changing the TMAX thrust spring
Once the spring is fully relaxed, it can now be safely removed and replaced with a harder spring to gain more torque and acceleration.
Install the thrust spring
It is now a question of proceeding in the opposite direction of dismantling. Replace the new spring and the Easyboost thrust spring holding tool and compress the spring by screwing the axle nut until it stops.
Tighten the nut of the torque drive
Tighten the nut by hand and then remove the removal tool from the thrust spring. Using the two Easyboost spanners, tighten the nut of the torque drive until the 2 marks drawn previously are aligned.
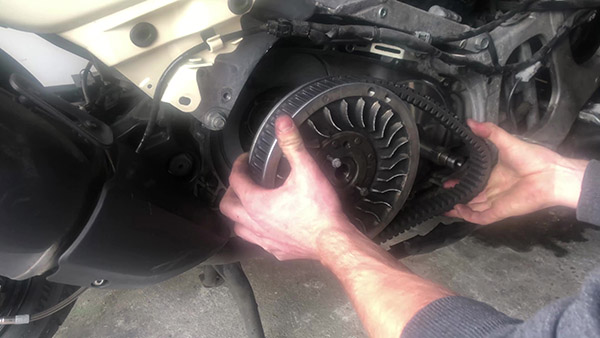
Install the belt and the torque drive
The torque drive is now equipped with the new thrust spring. All that remains to be done is to put it back on its axis, having first inserted the belt between the two flanges.
Mounting the variator
Once the rollers have been replaced, the variator can be reassembled on its shaft.
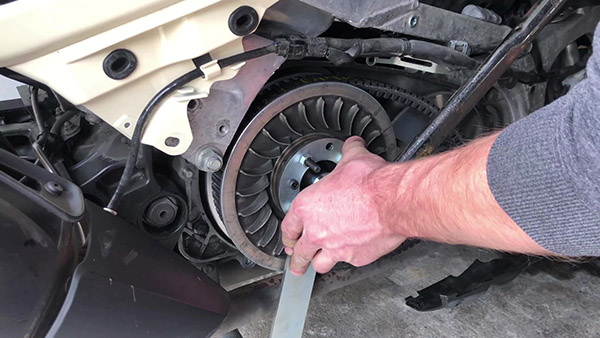
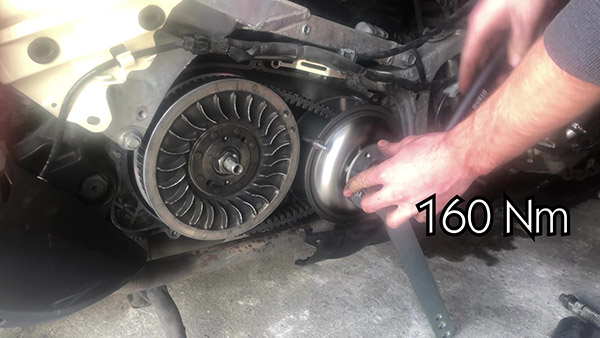
Tighten the variator nut to the torque recommended by the manufacturer.
The drive nut must be tightened to a torque of 160 Nm using the Easyboost spanner and a torque spanner with a 29 mm socket.
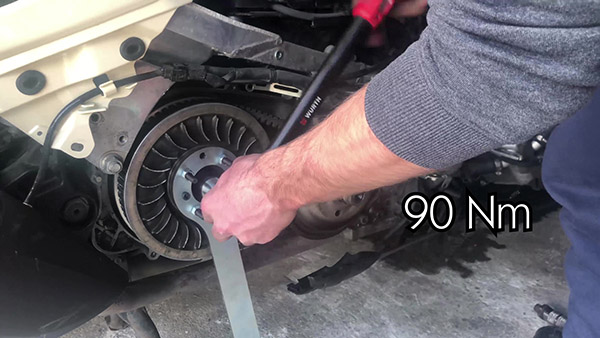
Tighten the nut of the torque corrector to the torque recommended by the manufacturer.
Using the Easyboost spanner and a torque spanner equipped with a 27 "long" socket, tighten the torque corrector nut to a torque of 90 Nm, as recommended by the manufacturer Yamaha.
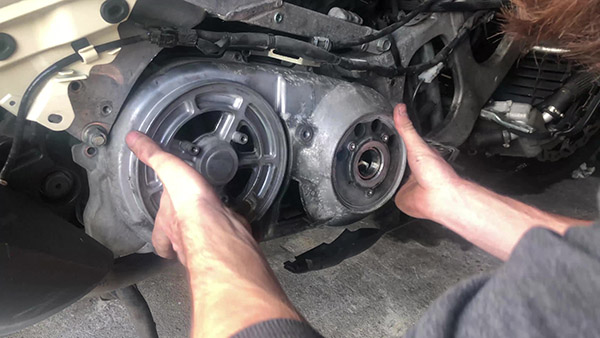
Install the CVT housing
The variation housing and the filter can now be refitted. Then all that remains is to reassemble the rocker panel, the footboard and the air intake to complete the operation.
For more details, we invite you to watch the YouTube tutorial video made by one of our customers :
François
10/27/2019 23:23:32
merci pour le matos ca fonctionne au top