How do I remove and change the roller belt variator of the BMW C600 and C650?
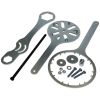
How can you improve and increase the performance and acceleration of your BMW C600 and C650? It is necessary to equip yourself with the Easyboost tool spanners which are essential for dismantling the variation of your maxiscooter. This will allow you to easily change the rollers, the variator, the belt, the clutch, the clutch springs and the thrust spring.
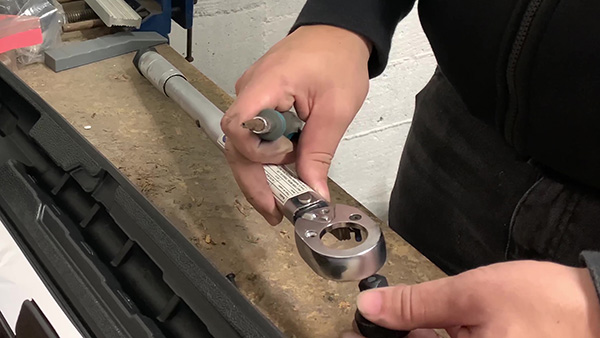
- Ratchet or torque spanner with sockets
- Torx spanners 25, 30, 40
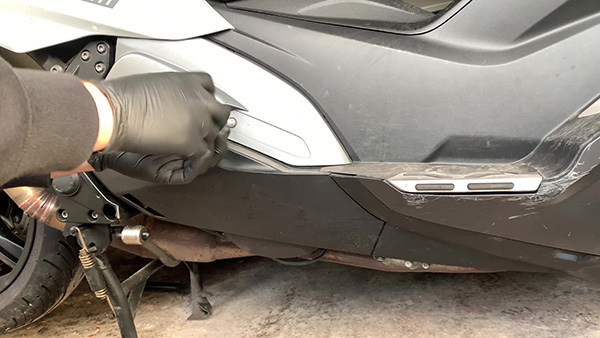
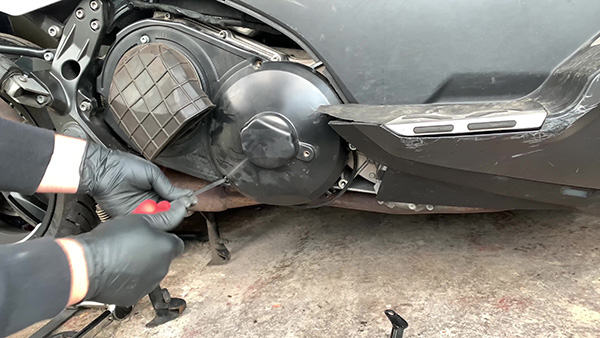
Dismantle the right rear fairings of the BMW C600-C650
Unscrew all the screws with a 25 mm Torx spanner so that the fairings covering the soundproofing and variator cover can be removed. Remove the footrest support.
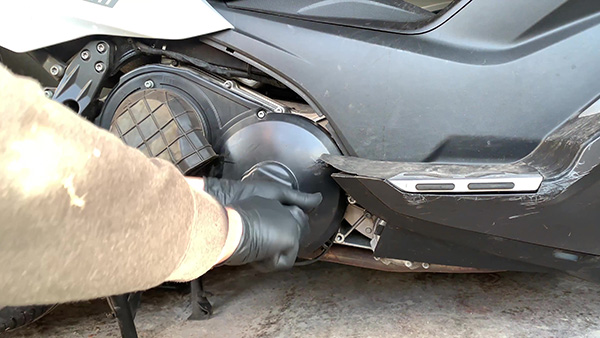
Dismantle the soundproofing cover.
Unscrew all the screws with a 30 mm Torx spanner so that the soundproofing cover can be removed and the variator cover can be accessed.
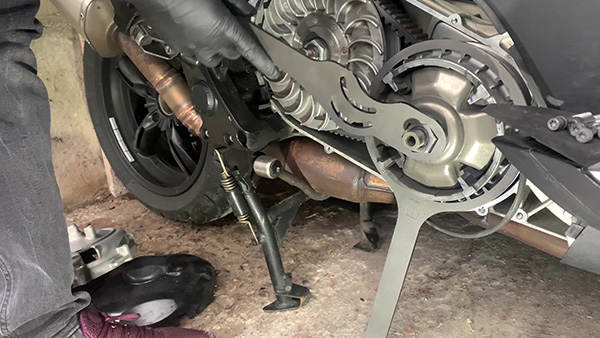
Remove the variator cover
Unscrew all the screws with a 30 mm Torx spanner so that the variator cover can be removed and the variator can be accessed.
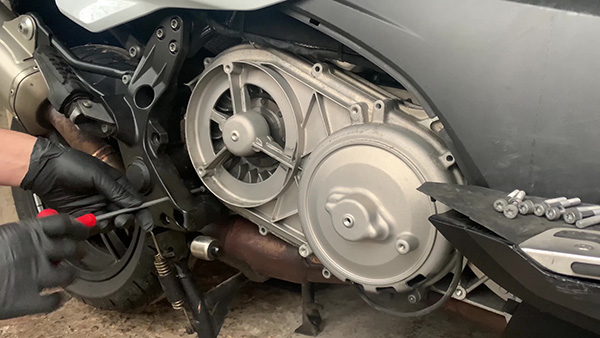
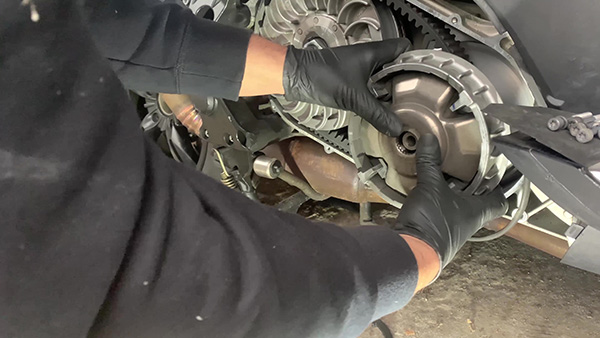
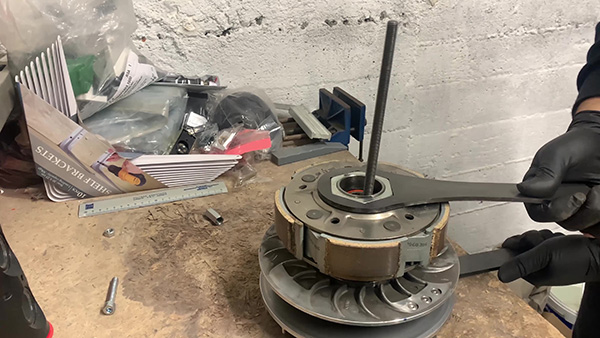
Removing the variator from the BMW C600 and C650
Place the Easyboost tool on the variator to lock it. Unscrew the shaft nut using the second Easyboost spanner or the ratchet with a 34 mm socket.
Removing the variator from the BMW C600 and C650
The variator can now be easily removed, together with the variator cap, rollers and hub.
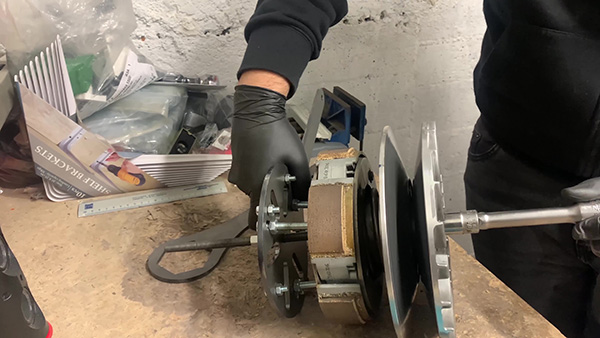
Dismantle the clutch-torque drive assembly from the BMW C600 and C650.
Place the Easyboost spanner on the torque drive to lock it in place. Unscrew the shaft nut from the shaft using the pawl with a 34 mm bush (clockwise as the pitch is reversed).
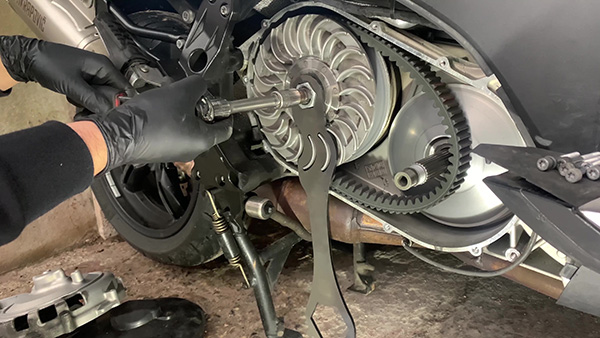
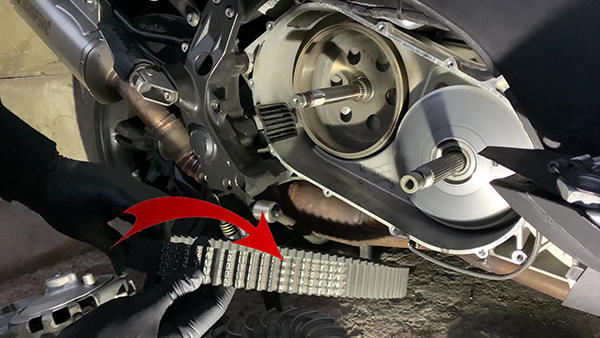
Take out the clutch torque drive and remove the belt from the BMW C600 and C650.
Then the torque drive-clutch-belt assembly is removed. The latter is easily released from the torque drive.
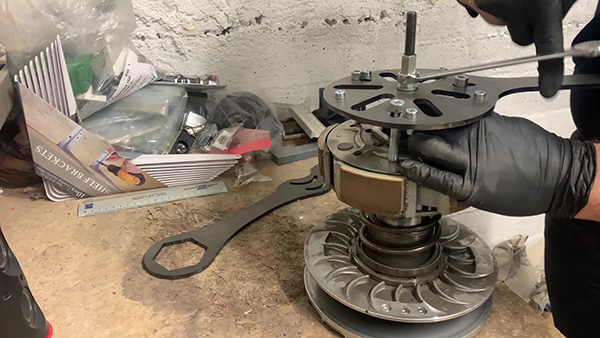
Loosen the clutch nut.
Before loosening the clutch nut, a mark is made on the felt pen so that it can be tightened again in the same original position. To easily remove the clutch nut, use the Easyboost tools. First, loosen the clutch nut by 1/4 turn with the Easyboost spanner and the open-end spanner by tapping it with a hammer.
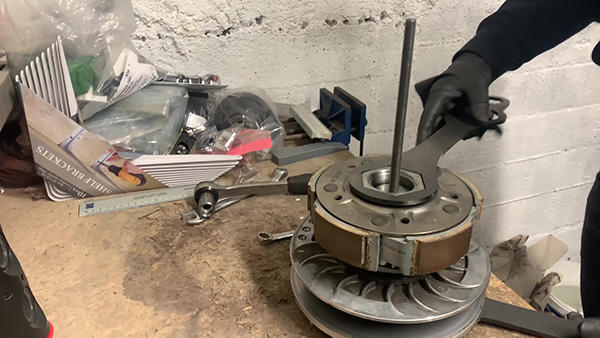
Inserting the tool to release the clutch nut
Once the nut has been released, the push spring disassembly tool is inserted following the instructions in the manual. This operation will allow the clutch nut to be released by exerting a slight pressure on the thrust spring. Caution: As the clutch is already in the end position, no attempt should be made to compress the spring any further.
Remove the clutch nut from the torque drive.
The nut can now be removed by hand as the clutch no longer exerts pressure on it.
Releasing the thrust spring
All that remains to be done is to unscrew the axle nut to gradually release the spring without risk.
Changing the BMW C600-C650 thrust spring
The spring is disassembled, it can now be replaced by a new and/or harder model to increase torque and recovery.

Compressing the BMW C600-C650 thrust spring
For reassembly, the operation is repeated in reverse order. The tool is put back in place to compress the thrust spring.
Tightening the clutch nut
Repeat the same procedure as for disassembly, inserting the tool for locking the torque drive. Using the open-end spanner, tighten the clutch nut until the previously drawn marks are aligned.
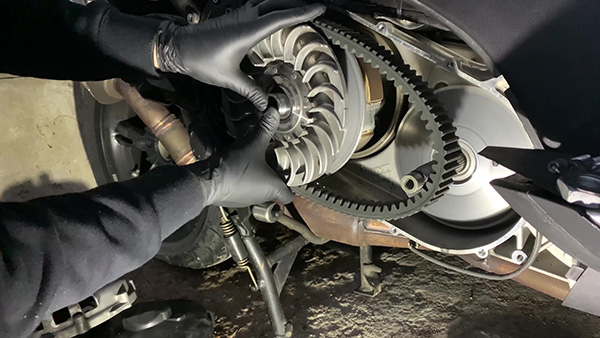
Mounting direction of the belt of BMW C600-C650
The arrows on the belt indicate the direction of rotation of the motor.
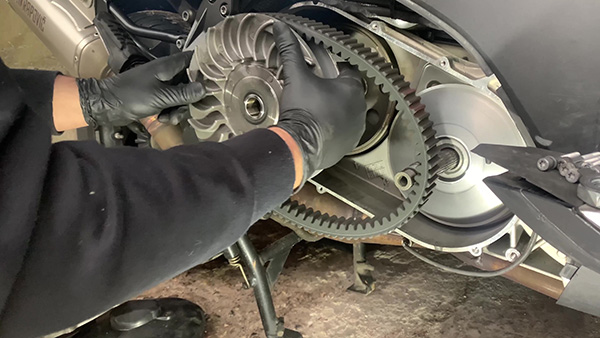
Install the torque drive and belt
Insert the belt into the torque drive and mount the assembly on the shaft.
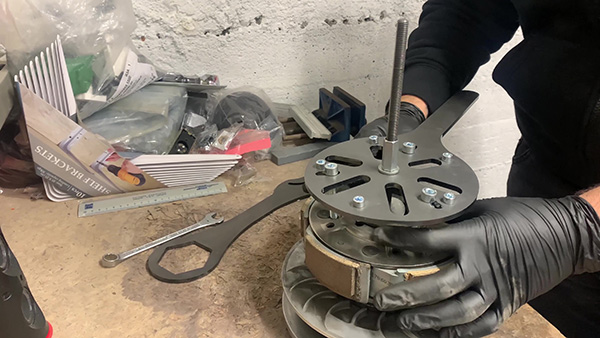
Mount the variator, hub, cap and rollers.
Insert the variator, hub, cap and rollers on the shaft.

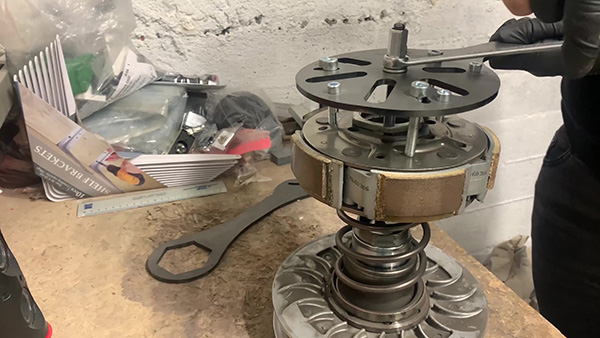
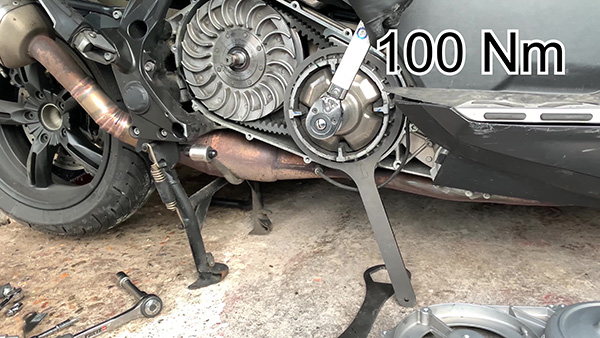
Tighten the variator nut to the torque recommended by the manufacturer.
The variator nut must be tightened to a torque of 100 Nm +/- using the Easyboost lock spanner and a torque spanner with a 34 socket. Do not forget to fold down the safety washer.
How do I reverse the tightening direction of the torque spanner (not reverse)?
To tighten the nut of the torque drive in the reverse direction, it is necessary to turn the end of the torque spanner. To do this, unscrew the torque spanner plate, turn the tip over and then replace the plate with the 2 screws.
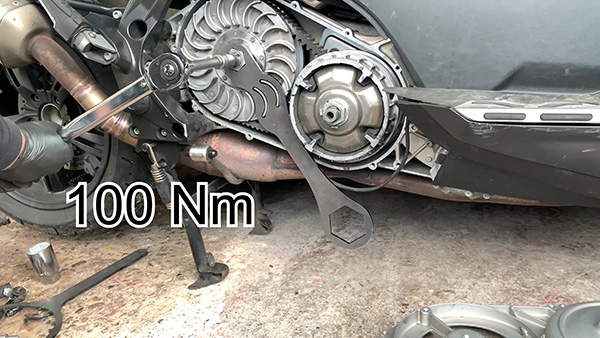
Tighten the nut of the torque drive to the torque recommended by the manufacturer.
After reassembling the variator housing, the nut of the torque corrector can be tightened to 100 Nm.
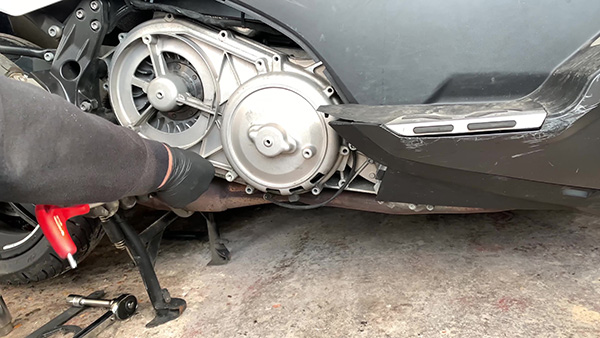
Refit the variator cover
All that remains to be done is to tighten all the screws on the dimmer cover before refitting the soundproofing cover.
Refit the soundproofing cover.
Tighten all the screws of the soundproofing cover before refitting the fairings.
Refit the fairings
All that remains to be done is to tighten all the fairing screws and refit the footrest support to complete the operation.

For more details, we invite you to watch the YouTube video tutorial made by one of our clients :